Seed-saving is a centuries-old practice that helps you prepare for next year’s garden now. When stored properly, seeds saved from your garden can be planted the following year for a bountiful harvest – free of charge.
To succeed with seed-saving, you’ll need to choose suitable plants, harvest your seeds at just the right time and store them properly.
In this guide, we’ll show you how to save seeds for some of the most popular garden plants and the best ways to store them.
How To Save Seeds
Before we get into the specifics of saving seeds for each type of plant, we need to cover one important thing:
One of the first things you need to consider when saving seeds is whether the plant varieties are open-pollinated or hybrid. Heirloom varieties are open-pollinated, as are many other varieties. These are the seeds you want to save, as they will come true from seeds.
Because hybrids are created by crossing two parent plants, they won’t breed true. So, make sure you’re only saving seeds from open-pollinated varieties. If you grew your plants from seeds, check with the seller to see whether the variety is open-pollinated or hybrid.
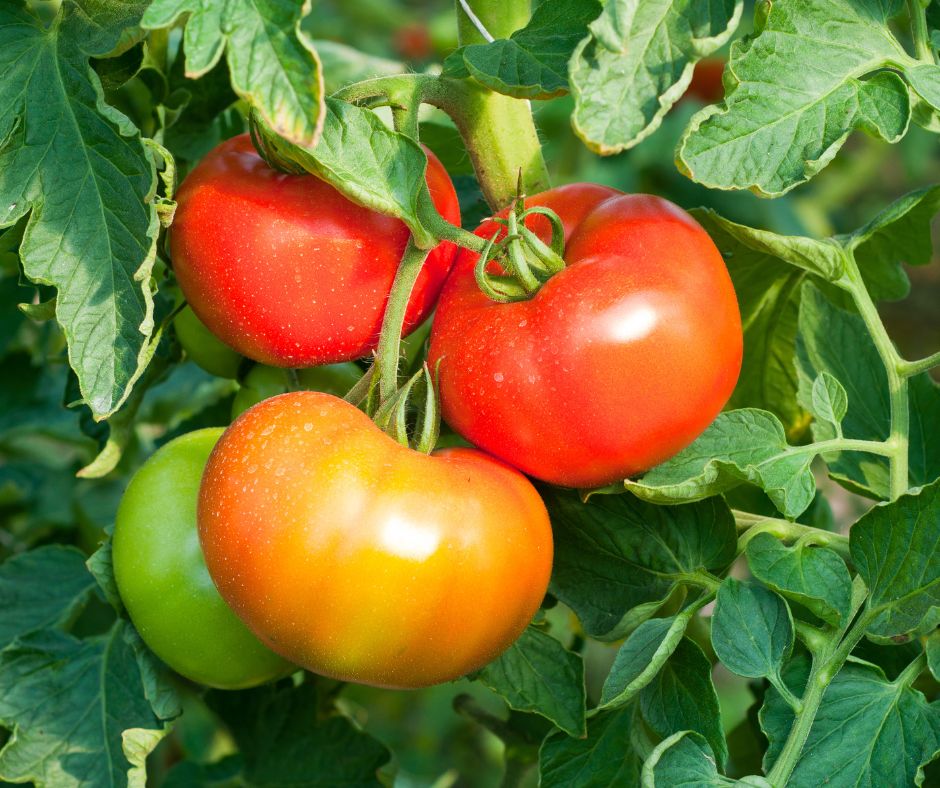
How To Save Tomato Seeds
When saving tomato seed, make sure you choose your best plants.
When we say “best,” we mean whatever you feel is best. It could be the biggest plant or the plant that produced the juiciest or most colorful tomatoes.
Avoid saving seeds from plants that struggled with disease or produced misshapen or under-ripened fruit.
For genetic diversity, save seeds from multiple tomatoes and, ideally, from more than one plant of the same variety if you can. Of course, you should only save seeds from ripe tomatoes.
Fermentation
While you don’t have to ferment tomato seeds, the process makes it a little easier to remove the seeds from the gel. It also helps weed out bad seeds and can reduce foodborne illnesses. If you plan to share your seeds with others, it’s considered a good practice to ferment them first.
How do you ferment tomato seeds?
Cut your tomato in half.
Squeeze or scoop out the seeds and gel.
Place the seeds and gel in a container labeled with the variety.
Add 1/4-1/2 cup of water to the container.
Set the container aside, away from the sun, for 3-5 days.
A moldy film may form, and that’s completely normal and okay.
To remove the seeds, first, carefully remove the film.
Add a little more water and stir.
Good seeds will sink, so gently pour off the water and bits of pulp floating at the top.
Repeat this process until all of the pulp is gone and your seeds are clean.
Drain, and spread your seeds on a paper plate or screen to dry out. Avoid using ceramic or plastic plates. The goal is to remove moisture from the seeds.
Don’t forget to label your plates if you’re saving seeds from different varieties. Tomato seeds are viable for years, so it’s well worth the effort to save seeds.
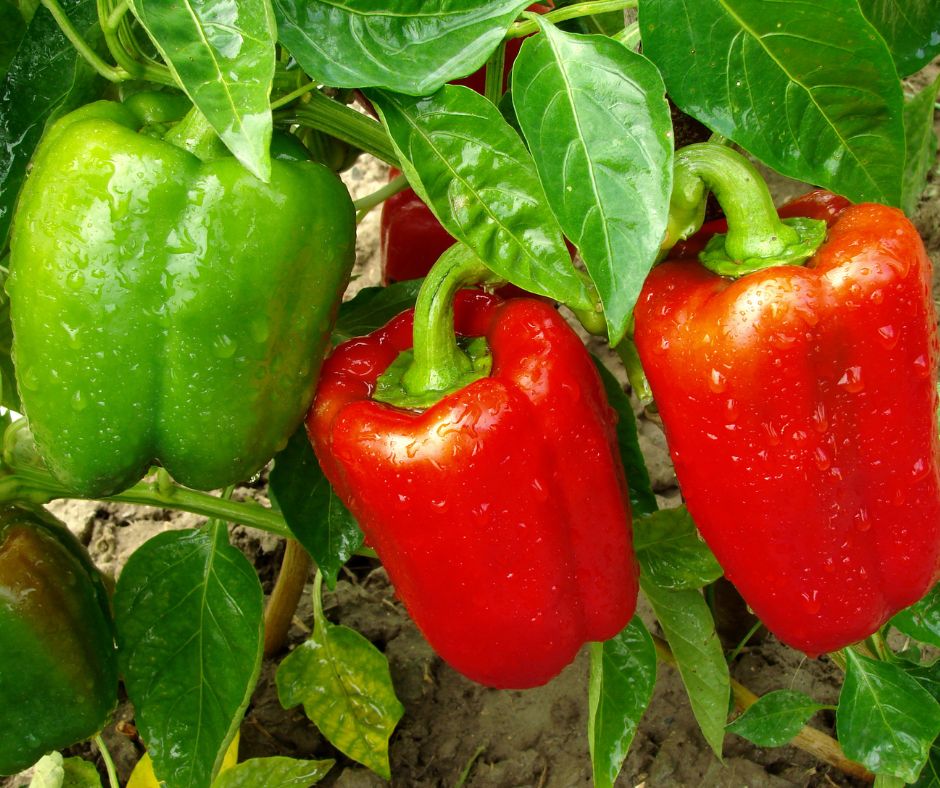
How To Save Pepper Seeds
Pepper seeds can be extracted using either a wet or dry process. Thick-walled peppers, like bell peppers, typically use a wet process. With thin-walled peppers, you can use either wet or dry.
Note: If you’re saving seeds from a hot pepper, take precautions to protect yourself from capsaicin. Capsaicin can irritate your eyes, skin and gloves. Make sure that you wear gloves, masks, goggles and a respirator when extracting seeds from hot peppers.
Like with tomatoes, you want to save seeds from the best plants.
Here’s the simplest way to save seeds from larger peppers:
Cut open the pepper and carefully scrape the seeds from the core.
Place the seeds in an ultra-fine mesh screen or strainer, and gently rinse to remove any leftover pulp.
Dry seeds. Coffee filters work well for the drying process. Make sure you place them in a warm, dry location that gets plenty of air circulation.
For thin-walled peppers, a dry process can work well for seed saving.
After harvesting your peppers for seed saving, allow them to dry out in a protected location.
The goal is to dry out the peppers until their flesh becomes brittle enough to break apart.
Once sufficiently dried, crush and rub the peppers in a larger container.
The dry process doesn’t work well for bell peppers and other thick-walled peppers because the fruit rots before it has a chance to dry out.
When properly dried and stored, your pepper seeds will remain viable for 2-4 years.
How To Save Pumpkin Seeds for Planting
Save seeds from your garden-grown or store-bought pumpkins to grow your own every year and have plenty of pumpkins to carve or eat.
Cut open the pumpkin to remove the seeds and pulp from the inside.
Place the pulp and seeds in a strainer.
Run cool water over the pulp, and start separating the seeds.
You’re going to have a lot of seeds – probably more than you can plant. Pick out the biggest and healthiest-looking seeds from the bunch to save. Plan to save three times more than you want to plant. You can roast the remaining seeds to snack on.
Take the seeds you want to save and place them on a dry paper towel. Make sure that the seeds are separated.
Place in a cool, dry place (a pantry works well!) for one week.
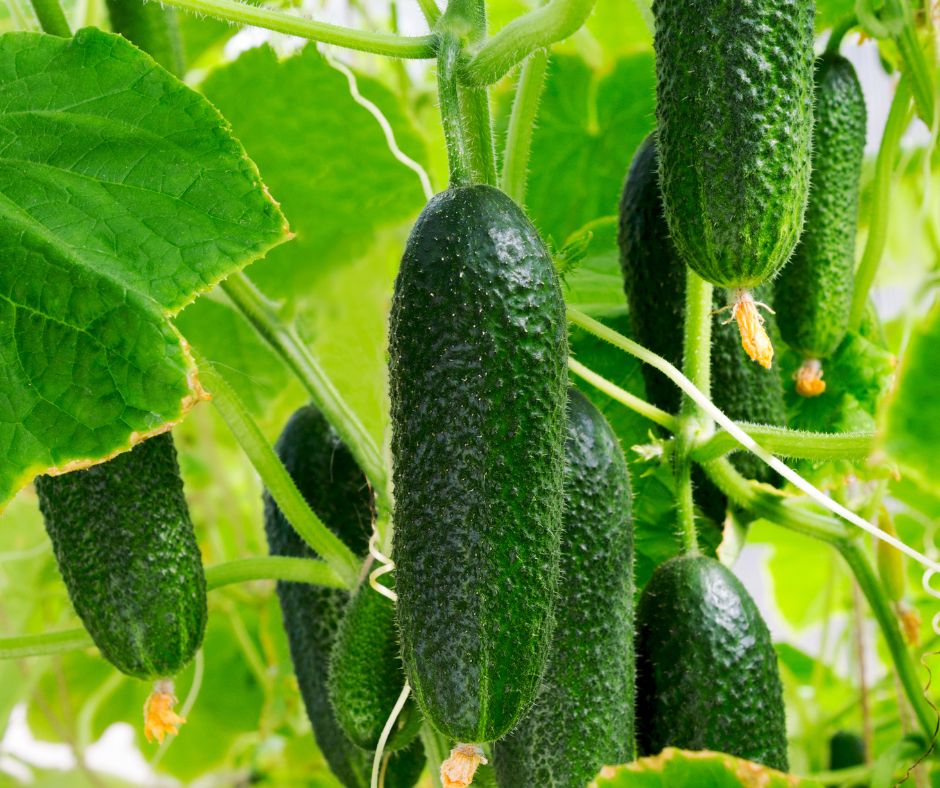
Saving seeds from heirloom cucumbers is very similar to saving seeds from tomatoes.
One important thing to note here is that because cucumbers require wind, insect pollinators or hand pollination, cross-pollination is possible. So, you may wind up with a mix of cucumbers when collecting seeds. If you’re serious about saving cucumber seeds, you should isolate the seed-saving plant from its cousins. For many gardeners, this really isn’t a practical option. So, be aware that cross-pollination may leave you with some weird results when you plant your seeds.
But what’s wrong with experimenting, right? Here’s what you’ll need to do to save your seeds:
Select cucumbers from disease-free plants and those that have the most flavor. Wait until your cucumbers are mature before harvesting seeds.
Cut your cucumbers in half lengthwise.
Scoop out the seeds and pulp.
Place the mixture of pulp and seeds in a small, clean container.
Cover the pulp/seed mix with water.
Allow the pulp/seed to ferment for 1-3 days out of the sun to separate the pulp from the seeds.
Once fermented, add more water, and stir.
The lightweight seeds and pulp will float to the top and can be removed.
Viable seeds will sink and should be saved.
Rinse the viable seeds clean and allow them to dry out on coffee filters.
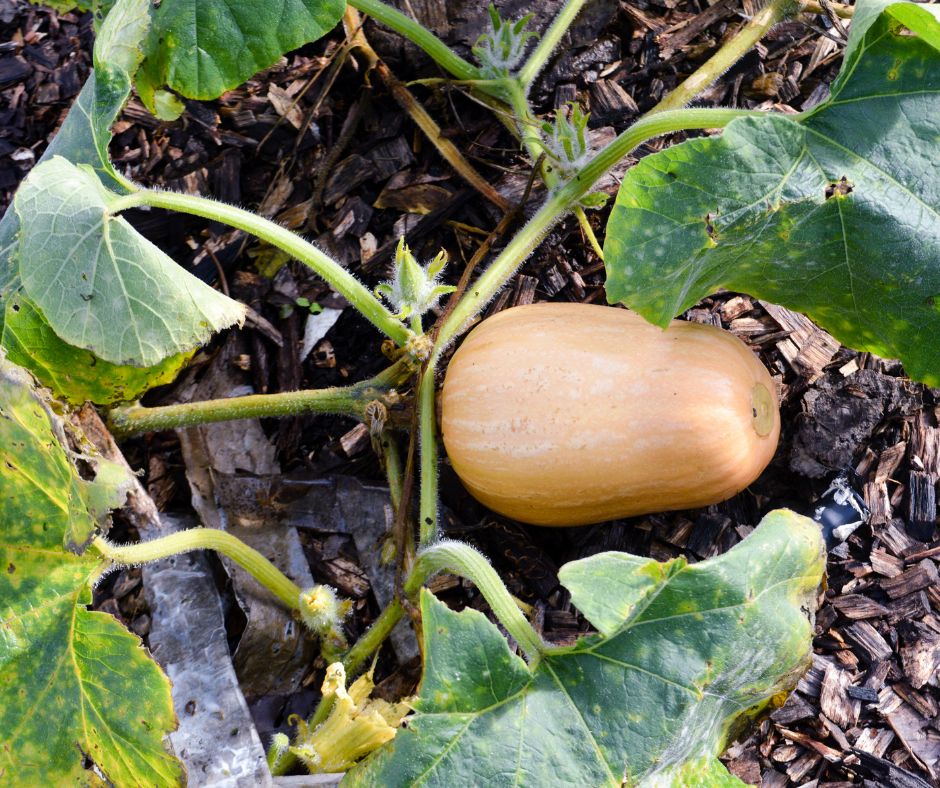
How To Save Seeds from Squash
To save seeds from squash, you’ll follow the same steps as you would with saving pumpkin seeds. In fact, a pumpkin is a squash, so the process is exactly the same.
Cut open the squash.
Scoop out the pulp and seeds.
Place the seed/pulp mixture in a strainer.
Rinse with cool water, and begin picking out the seeds.
Save the biggest seeds, and roast (for snacking) or discard the remaining ones.
Lay the seeds you want to save on a clean, dry paper towel for a few days to dry out.
Store your seeds in an envelope for planting next year.
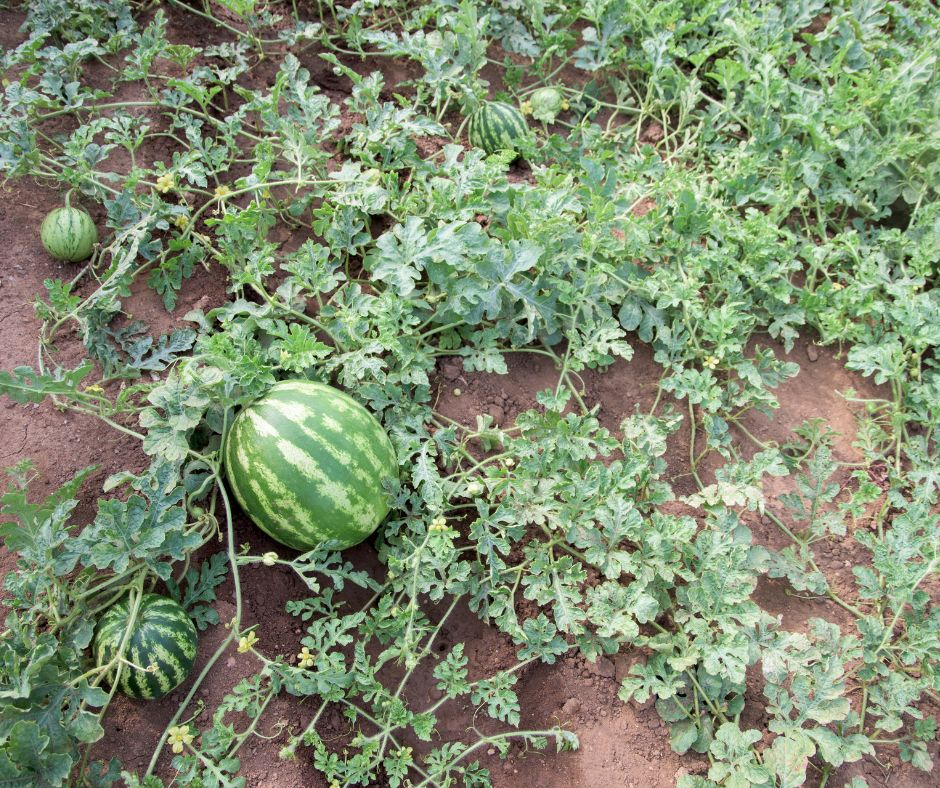
How To Save Watermelon Seeds
Saving watermelon seeds is easier than you think. It’s hard to beat a fresh, juicy watermelon from the garden, so it’s worth the time to save seeds from your best crop.
To save seeds:
Cut up the watermelon.
Collect the seeds in a bowl or cup.
Place your seeds in a strainer.
Rinse the seeds and remove any remaining juice and pulp.
Lay your seeds out on wax paper and allow them to dry for one week.
Once dried, store your seeds in a paper envelope for planting next year.
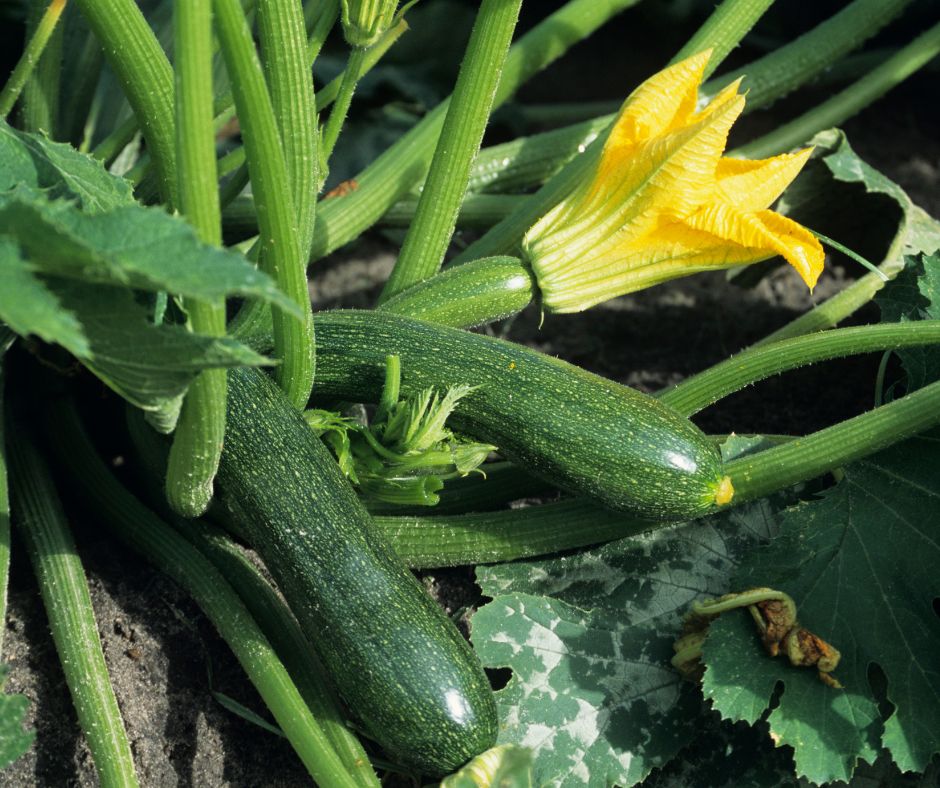
How To Save Zucchini Seeds
Saving zucchini seeds is a straightforward process, but you won’t be harvesting seeds from zucchini that you’ll be eating. In fact, the zucchini you know and love to eat is actually an immature fruit. If you want to save seeds from your plant, you’ll need to wait until you have mega zucchinis.
Wait until they are large and swollen and their skin is hard. The zucchini will be inedible, but you’ll be able to save the seeds.
To prepare the seeds for storing, you’ll use a similar method to tomato and cucumber seed saving.
Slice the zucchini in half lengthwise.
Scoop out the seeds and pulp and place them in a clean container.
Compost the rest of the zucchini.
Add just enough water to cover the seeds and pulp mixture.
Allow the seeds to ferment for 1-3 days.
Once fermented, add more water to the container to filter out the viable seeds. The pulp and unviable seeds will float to the top. Remove them. Viable seeds will sink to the bottom.
Rinse the viable seeds.
Lay the seeds out on coffee filters to dry.
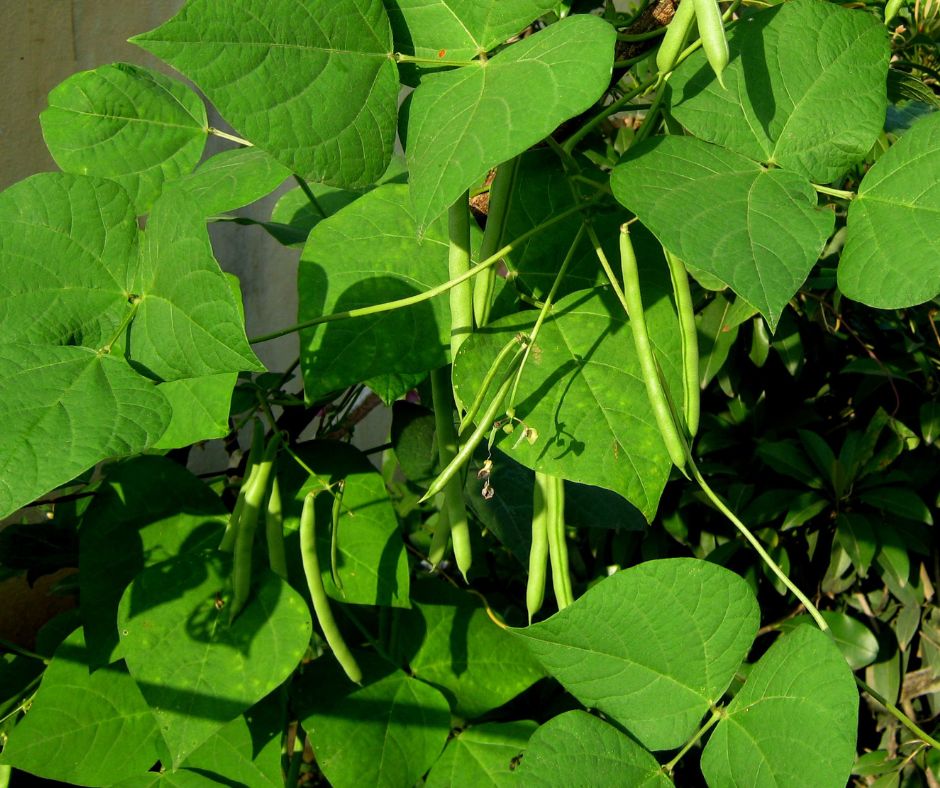
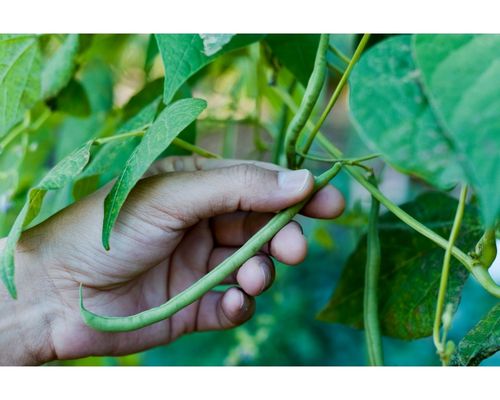
How To Save Green Bean Seeds
Beans are so easy to grow and a popular garden crop. The great news is that saving seeds from your green bean plants is easier than you think.
To save seeds:
Allow the green beans to ripen and dry out to the point where they are starting to brown.
At this stage, the seeds will be loose. In fact, if you shake the pod, you should hear them rattle. It can take a month or so to reach this stage.
Once fully dried out, you can harvest.
Remove the pods from the plants, and allow them to dry inside for at least two weeks.
At this point, you can shell the beans or leave the seeds inside of the seed pods until you’re ready to plant next year.
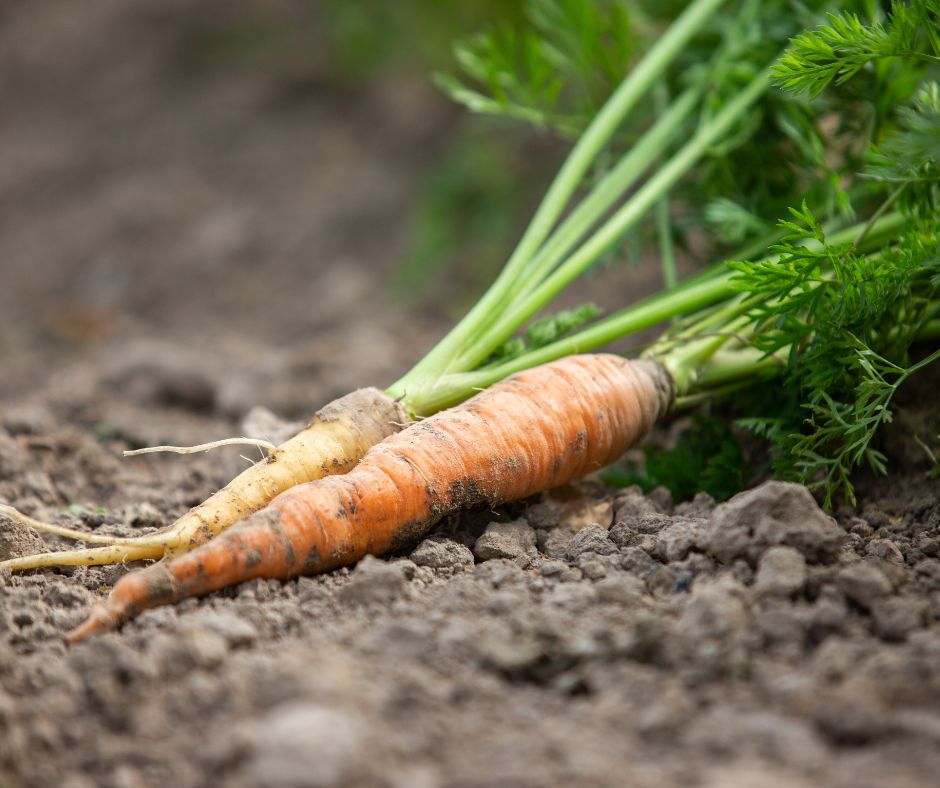
How To Save Carrot Seeds
Saving carrot seeds is worth the effort. Each plant can produce up to 1,000 flowers! That gives you the potential to grow a thousand carrot plants in the future.
Carrots are biennials, which means you’ll have to wait two years to harvest their seeds. To ensure that you get carrots that are true to their type, you’ll need to start the process in the first year.
One of the first and most important steps is to isolate your selected carrot plants from other varieties. Otherwise, pollinators may fertilize your carrots with pollen from other varieties, and you may not wind up with carrots that are true to type.
Vernalization
It takes two years for carrots to complete their reproductive cycle, and it’s the cold season that tells these plants to start reproducing. That cold period is called vernalization, and it’s what triggers the flowering needed to collect seeds.
If you have at least 10-12 weeks of temperatures below 59°F in your area, then you can easily overwinter your carrots in your garden (keep them in the ground).
For regions where the ground freezes, you can still keep your carrots in the ground if they are well mulched.
If it’s too warm or too cold in your area, you can harvest your carrots, trim off the greens and store them in a root cellar or fridge for the winter to mimic this cold state.
In spring, carrots that have been stored can be replanted at the same time you would normally plant carrot seeds. Only choose healthy carrots to replant. Some may not survive the winter. Any rotted carrots can be composted.
Keep your carrots three feet apart to give them room for growth in their second year. Watch for leafy flowers. Carrot flowers are umbrella-shaped with beautiful white flowers. They look similar to dill or caraway.
Allow the blooms to dry out. When the flower clusters have dried out in late summer, you can then harvest the seeds.
Experts recommend saving seeds from at least five plants to ensure enough genetic diversity and viable seeds.
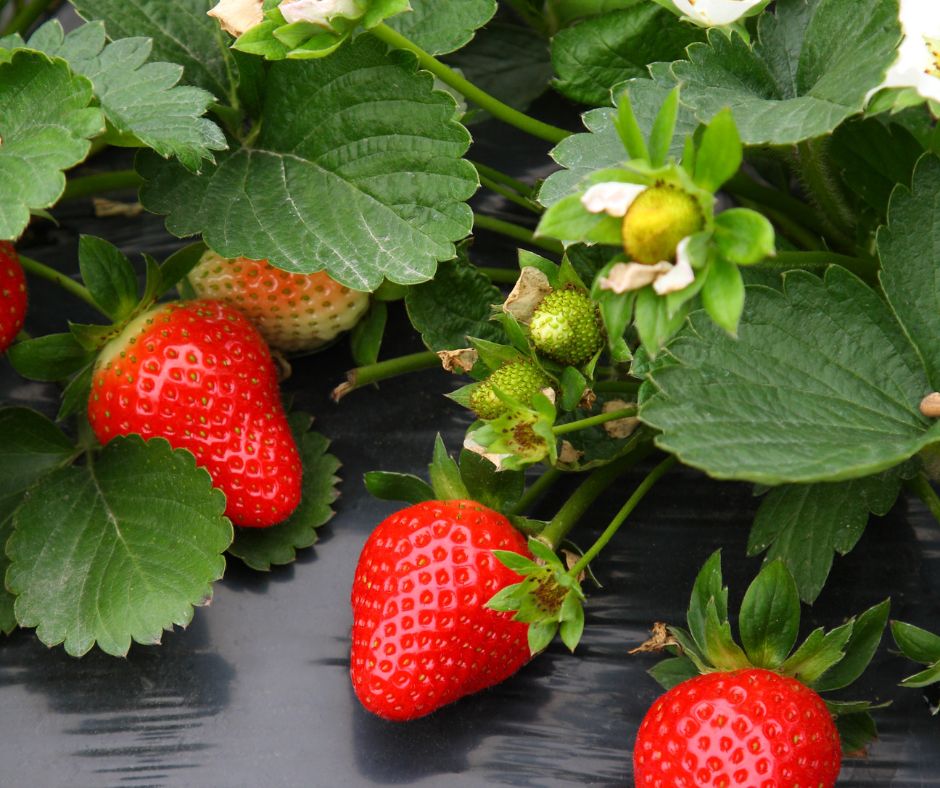
How To Save Strawberry Seeds
Unlike most other plants, strawberry seeds are on the outside of the plant. These perennial plants will continue to produce berries every year for three to four years. Saving seeds will help you grow your strawberry patch and keep it thriving for years to come.
Here’s how to save seeds from strawberries:
Choose ripe, healthy berries for seed saving.
To separate the seeds, place the berries in a blender along with a cup of water.
Blend for just a few seconds, and allow the mixture to sit for a minute or two.
Viable seeds will sink to the bottom.
Unripe seeds and the pulp will float to the top.
Carefully pour off the liquid.
Collect the high-quality seed, and gently rinse them off.
Lay the seeds out on a clean, dry paper towel to dry out.
Once dried out, your seeds are ready for storing and planting next year.
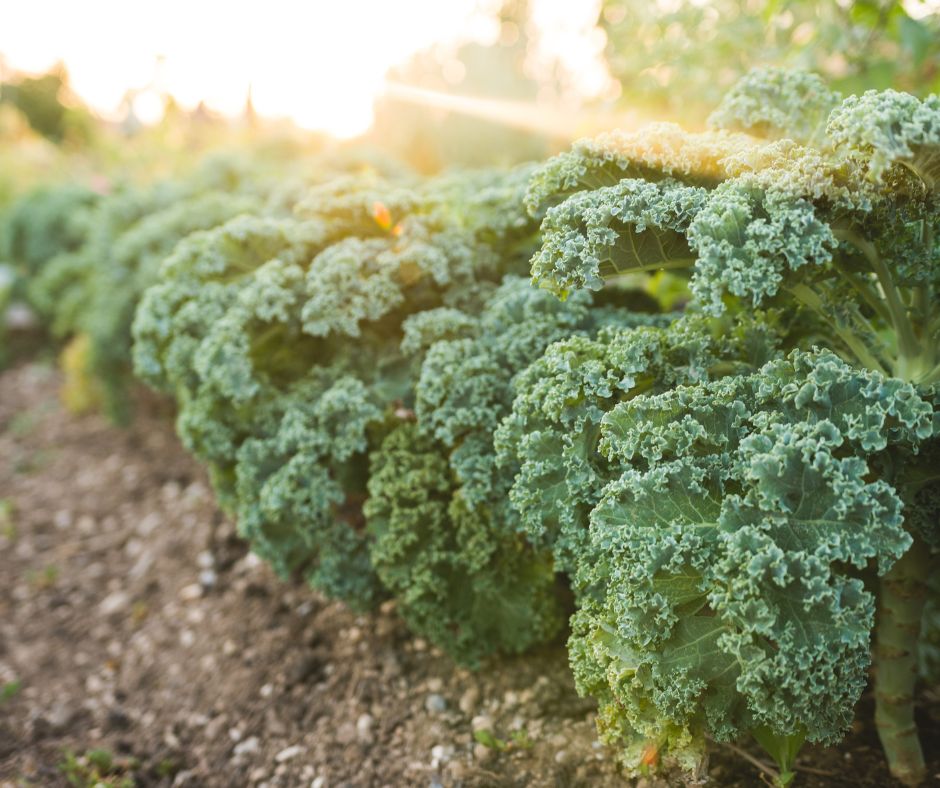
How To Save Kale Seeds
Like carrots, kale is a biennial plant, which means it takes two years to complete its reproductive cycle. In other words, your kale plants won’t go to seed until year two.
To get your kale plants to flower, you’ll need to let them overwinter. If you’re in zones 7-10, you can allow your plant to overwinter right in the garden and harvest leaves all season long.
But to keep your plants healthy, it’s important to lay down a thick layer (4”-6”) of mulch around your kale. You can use pine straw, leaf mold, grass clippings or even sawdust as mulch for your kale.
You can continue harvesting leaves in the spring. In summer, your kale plant will have completed its life cycle and will send out flower stalks. You can still harvest leaves at this time, but they won’t be as flavorful once the plant starts flowering.
Kale’s flower stalks can grow to be 3-5 feet tall. Once they finish flowering, the plant produces long, thin pods on its stalks. Soon after, they fade from green to a beige/brown color. Now is the time to harvest the pods. If you wait too long, the pod will burst open and release its seeds.
Cut the stalks down to the ground.
Invert the stems, and place the heads in large paper bags.
Hang the stalks in a cool, dry place away from wind.
It can take 10-21 days for the pods to dry out thoroughly.
Then, you can shake the bag to dislodge the seeds.
But you’re not done yet! You still need to go through a process called winnowing to separate your seeds from the chaff. Fortunately, winnowing is a pretty simple task. Use a screen with holes large enough for the seeds to fall through. Gently shake the seeds, and the chaff should be left on the screen.
Although it’s a bit of work to save kale seeds, one plant can easily produce hundreds of seeds.
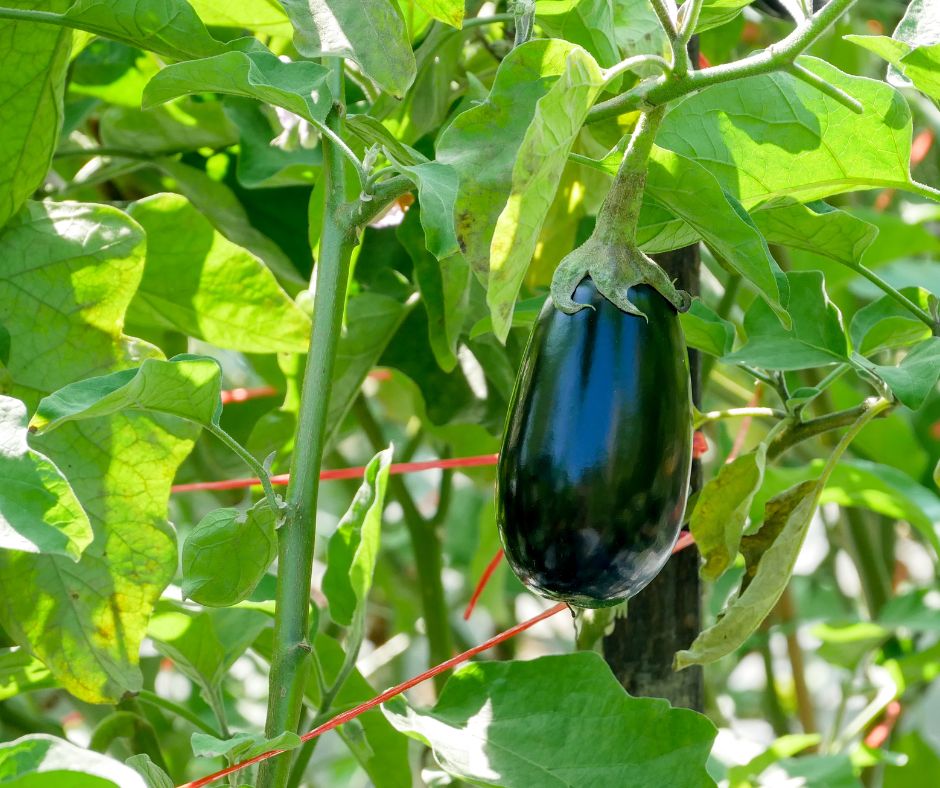
How To Save Eggplant Seeds
Saving seeds from eggplants is easy, but you’ll need to be patient. Before harvesting the seeds, you need to wait until the fruit is overripe to the point where it’s inedible. The eggplants you harvest for eating have immature seeds.
How do you know when your eggplants are overripe?
Purple eggplants will turn brown or tan
Green and white eggplants will turn yellow
Eggplants that are overripe will be hard with shriveled skin
To harvest seeds:
Slice open the eggplant.
Scoop out the seeds.
Fill a bowl with water and add the seeds.
Separate the pulp from the seed.
Strain the seeds and dry them with a paper towel.
Lay the seeds out on a tray or paper plate to dry out.
It can take 2-4 weeks for the seeds to fully dry out.
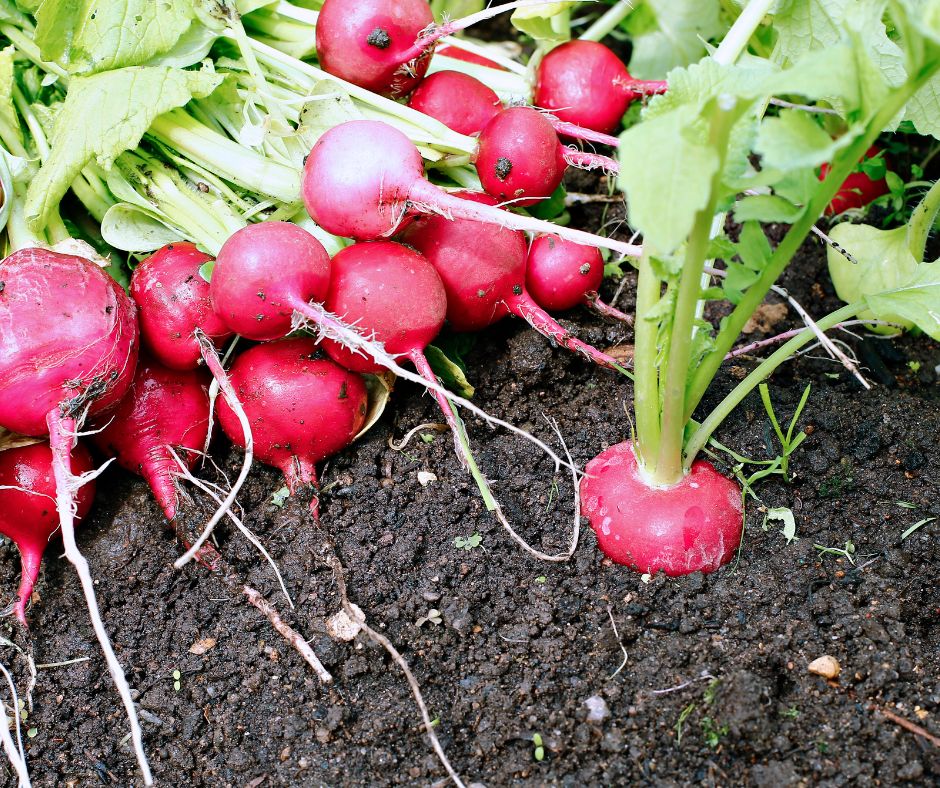
How To Save Radish Seeds
It’s easy to harvest radish seeds from your garden, but you’ll need to be patient and forfeit some plants in the process.
To collect seeds, you’ll need to let some of your radish plants bolt (flower). Your radishes won’t be edible at this point, but you’ll be rewarded with plenty of seeds to plant next year.
Radishes tend to bolt mid-summer when temperatures are at their hottest. Wait until the pods have turned brown and become brittle. In most areas, this happens around early to late summer.
Cut the branches with pods, and leave them to dry out on landscape fabric or a row cover in a sheltered spot. It typically takes 1-5 days for the pods to dry out completely.
You’ll need to separate the seed from the chaff to access the seeds.
How To Save Dill Seeds
Dill is such a great addition to the garden and great for companion planting to keep pests away. It’s a great herb to add to so many dishes, and its flowerheads add a bit of whimsy to the garden, too.
Another thing you’ll love about dill is that the seeds are so easy to save. And one flowerhead can produce a lot of seeds that you can use for pickles, soups, stews and more. Of course, you can use them for planting new dill, too.
Here’s how to save seeds from this flavorful herb:
The simplest way to gather seeds from dill is to let the plant dry itself out in your garden. Once the flowerheads have turned brown and become dry, you’re ready to start harvesting your seeds.
If you’re impatient, you can cut the blooms from the plant (wait until they’ve finished blooming), and place the stems in a paper bag, flowerhead-side down, to dry out.
Once your plants are dry, grab one of the flowerheads and a paper plate.
Gently rub the seeds off the ends of the stems. They should come off fairly easily now that the plant is dried out.
Repeat until you’ve gathered all of the seeds from your flowerheads.
It couldn’t be easier to gather seeds from dill, and you can use them however you want. You’ll likely have more seeds than you can plant, so don’t be afraid to add them to some of your favorite dishes.
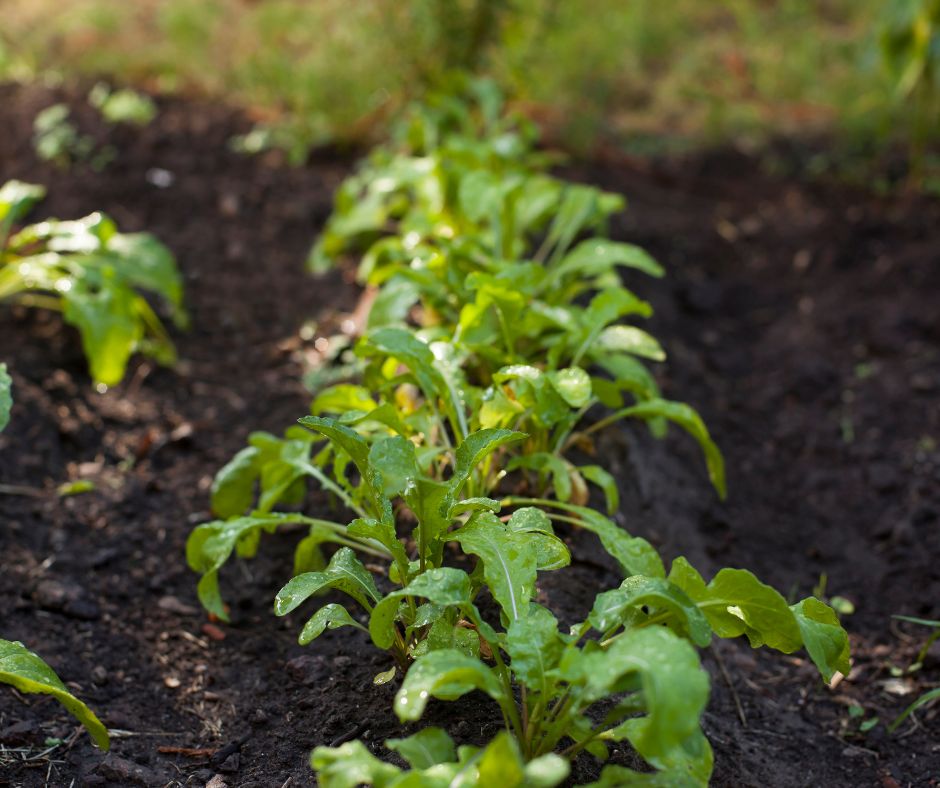
How To Save Arugula Seeds
Arugula is a wonderful, easy crop to grow in spring and fall. But in hot weather, it tends to bolt very quickly. When it bolts, it sends out little white flowers with pretty dark veins. Shortly after, arugula will form little seed pods along the stem. The seed pods are edible but very spicy.
At this stage, you’ll need to let your plants dry out.
Once your plant has dried out and turned brown, it’s time to clip the stems and bring them inside. You’ll know the plants are ready if you hear a rattling sound when shaking the pods.
Hang the plant upside down in a paper bag for about a week.
To harvest your seeds, you’ll need to do some threshing. You can gently shake the bag or crumble the seed pods to set the seeds free.
At this point, you’ll have some chaff mixed in with your seeds. You can remove the chaff by either blowing it off or using a sieve with holes bigger than the seeds.
Saving arugula seeds requires patience, but it’s a simple process that’s worth the wait.
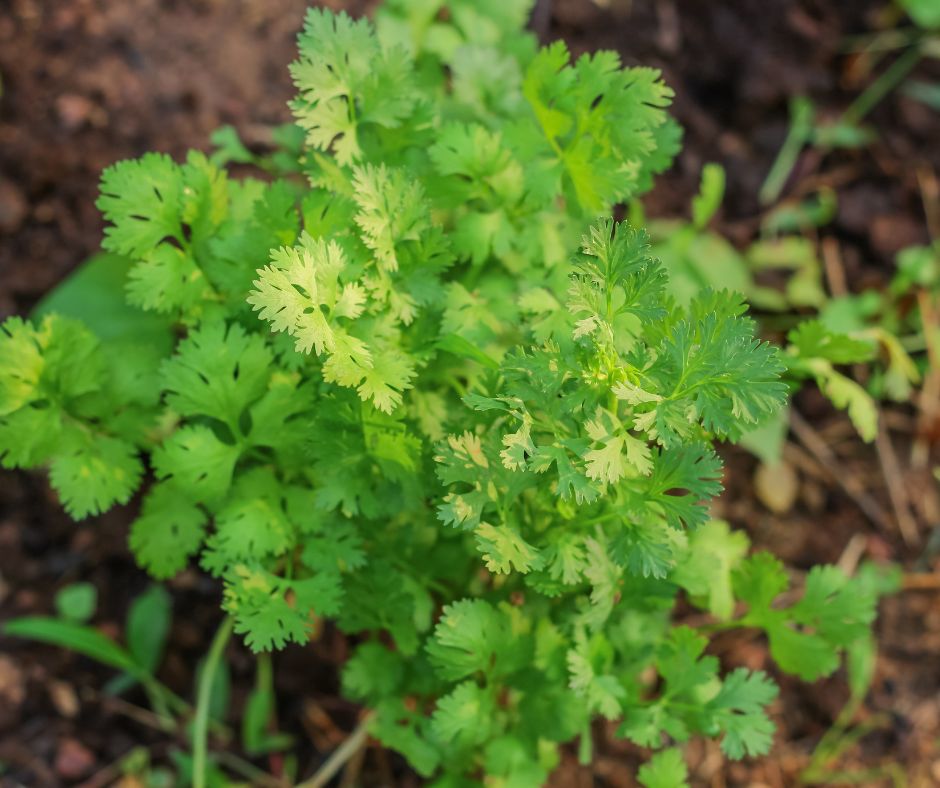
How To Save Cilantro Seeds
Saving cilantro seeds, or coriander, is easy. I love that this herb is so easy to grow, and the seeds are wonderfully flavorful. You can save some for cooking and save another batch for planting.
Here’s how to save seeds from this garden-favorite herb:
You’ll need to let your plants flower if you want to save their seeds. Once the flowers die, they produce clusters of brown-colored seeds.
Wait until the flowers have completely dried out and turned brown. You can just leave your plant in the garden – no fussing required!
Coriander seeds are quite big and easy to see, so you’ll know when they’re ready for harvesting.
Grab a clean container and gently rub a seed head between your fingers to release the seeds.
It really is that easy to save cilantro seeds! If you want, you can just let the plant die back naturally and drop its own seeds to have continual cilantro plants growing each year.
How To Save Seeds from Marigolds
Marigolds are a great addition to any flower or vegetable garden. They’re easy to grow, low maintenance, add bright color and keep pests away. Because they are annuals, they need to be replanted every year. The good news is that you can save seeds from your plants each year to have a free, endless supply of marigolds.
Saving marigold seeds is easy, but finding them can be tricky. Why? Because these plants don’t produce recognizable seed pods.
The key is to wait until the flowers have died back and dried out.
Look for flowers that have withered and dried but still have a little green at the base.
Remove the flower head from the plant by cutting a few inches down the stem.
Gently pinch off the petals while holding the base of the flowerhead with your other hand.
As the petals slide off, you should see some pointy black spears. Here are your seeds. They look kind of like mini broomsticks.
Once you’ve gathered your seeds, you can save them for planting next year.
Storing Seeds
Gathering seeds is a rewarding practice and one that will continue to fill your garden with healthy vegetables or herbs for your family. Once you’ve harvested your seeds, make sure that you store them in an airtight container in a cool, dry place. Optimal seed storage is the key to ensuring your seeds have good germination rates.
Late summer is approaching, which means we’re knee-deep in the summer harvest period. While you’re busy harvesting, tending and feeding your summer crops, it’s time to start thinking about fall. Mid-to-late summer is the ideal time to plant cool-season crops in your fall vegetable garden.
If you’re not sure where to begin, we’re going to cover what vegetables to plant in fall and when to plant cool-season crops.
What to Plant in Your Fall Vegetable Garden
Fall brings cool temperatures and fewer hours of sunlight, so you’ll want to plant hardy vegetables in your garden bed or containers. There are plenty of fresh vegetables you can grow in fall and keep your garden beds producing before the first frost.
Here are some great cool season crops to plant:
Chinese Cabbage
Fall is the perfect time to grow just about any plant in the cabbage family, but Chinese cabbage is especially easy to grow. There are two main varieties:
Napa cabbage
Bok choy
Chinese cabbage grows very easily from seed, but you can also purchase transplants or start your seeds indoors if you want a quicker harvest.
Seeds should be started indoors 6 weeks before being planted outdoors. If you plan to sow your seeds directly into the soil:
Plant them 6-8 inches apart
Thin to 12-18 inches apart once they sprout
Plants that are close together will be more flavorful, but they’ll also be smaller and more prone to disease.
Leafy Greens
Hardy greens are perfect for fall gardens, and with the right setup, you can enjoy harvests through early winter.
Some of our favorite leafy greens to plant in fall are:
Spinach
Kale plants
Mustard greens
Asian greens
Collards
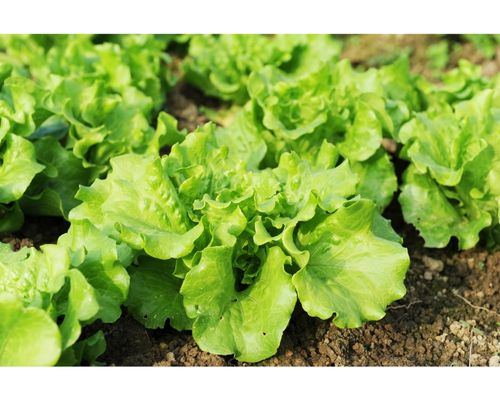
Bibb and leaf lettuce
Swiss chard
Leafy greens like the ones above thrive in a soil temperature of around 60 degrees Fahrenheit, which makes them ideal for fall planting. Kale is especially hardy and can withstand soil temperatures below 50 degrees Fahrenheit and light frosts in many cases.
If you’re sowing seeds directly into the soil, try to plant seeds every two weeks to ensure a continuous harvest.
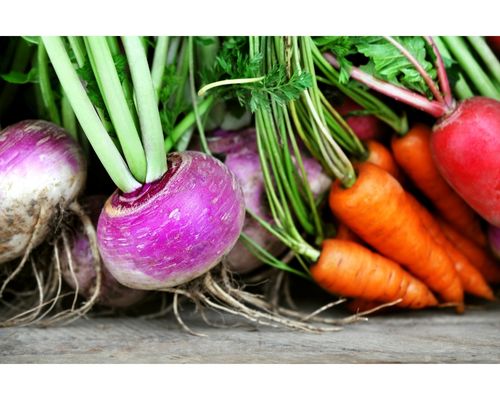
Root Crops
Root vegetables are perfect fall crops to plant. Some great options are:
Beets
Carrots
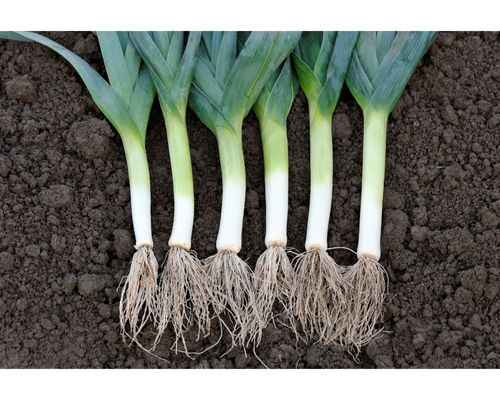
Leeks
Turnips
Rutabagas
Kohlrabi
Potatoes
Parsnips
Radishes
The great thing about root vegetables is that they can be stored for several months.
Beets can keep for 1-3 months. Store them in an open container with a damp towel over the top. Don’t put them in the refrigerator.
Carrots can keep for 4-6 months. Store them in an open container in a cool place (like the crisper drawer of your refrigerator) and wrapped in a damp towel.
Kohlrabi can keep for 2-3 months without its leaves. Store them in a perforated plastic bag in the crisper drawer of your refrigerator.
Parsnips can keep for 2-6 months without their greens. Store them in the crisper drawer of your fridge wrapped in a damp towel.
Radishes can keep for one month in the fridge covered in a damp towel. If you have a root cellar, they can keep for up to three months if stored properly.
Rutabagas can keep for 2-4 months if placed in wooden crates or buckets. Make sure the roots aren’t touching each other.
Potatoes can keep for 5-8 months if stored in a cool, dark place.
Turnips can keep for 4-5 months if stored in a container covered with a damp cloth.
Bush or Pole Beans
If you want a crop of beans in the fall, plant pole or bush beans. Although bush beans are preferred as a fall crop, you can still incorporate pole varieties in your fall vegetable garden plan.
If you’re planting a bush variety, look for one that matures within 45 days.
Garden Peas
Another great crop to grow for fall is garden peas. They’re easy to grow, and they can withstand chilly temperatures. But there’s one important thing to note here: you need to start your seeds pretty early.
It’s best to start your garden peas in late June or early July. Even though the harvest time is around 60 days for many varieties, it’s important to remember that the days are getting shorter after the summer solstice. It can easily take 70 days for your peas to be ready, so start a little earlier to ensure a healthy fall crop.
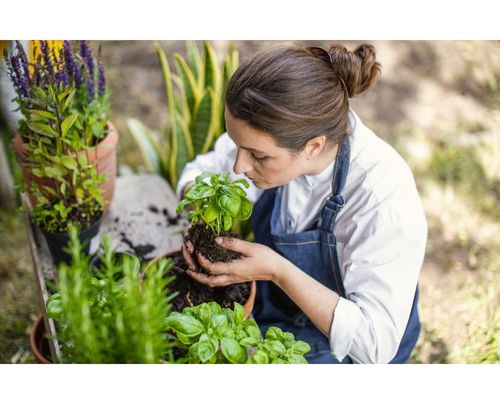
Herbs
Fall is a great time to plant hardy herbs. If you live in an area with mild winters, you can easily grow herbs until pretty late in the season.
Some of the best herbs to plant in mid-to-late summer are:
Sage
Parsley
Lavender
Cilantro
Mint
Chives
Thyme
Rosemary
These are herbs that are fairly easy to grow and will reward you with flavorful aromatics to add to your favorite fall dishes.
Leeks
Leeks are another excellent crop to plant for fall, but like with peas, you’ll need to get started early with your seeds.
If you can get into the practice of successional sowings, you can enjoy leeks throughout much of the year.
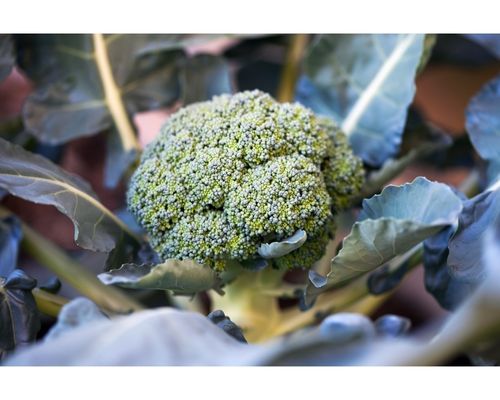
Broccoli
Among the many cool-season vegetables, broccoli is a favorite. For a fall crop, you can sow your seeds directly into your garden beds anywhere from July through mid-August, depending on which zone you’re in.
Broccoli is easy to grow, but it loves moisture and needs some space to spread out.
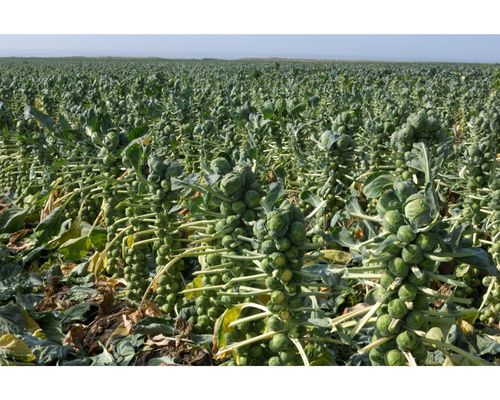
Brussels Sprouts
Early fall is the perfect time to plant Brussels sprouts, as they prefer cooler temperatures. Just make sure that you give them plenty of space to spread out.
Keep them 18-24 inches apart, and plant them in an area that gets at least 6 hours of sunlight per day.
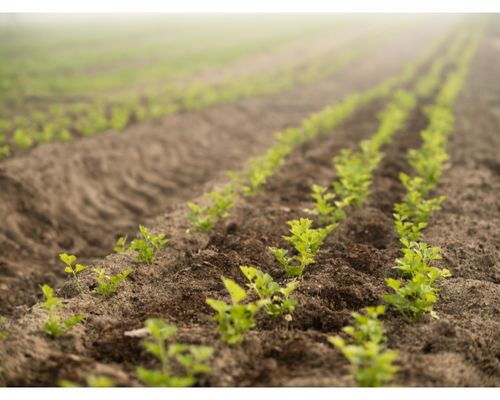
Celery
Celery requires a long growing season, so it’s best to start your seeds indoors. For a fall harvest, start your seeds 10-12 weeks before the first expected frost date.
Celery requires moist soil and can take up to 140 days to come to harvest.
Cauliflower
For a fall crop, plant cauliflower 6-8 weeks before the first frost. Be sure to shade them, as cauliflower isn’t a fan of the heat. They prefer moist soil, so don’t let the ground dry out when planting.
When to Plant Your Fall Vegetable Garden
Now that you know what to plant, you may be wondering when you should start your fall garden. The answer really depends on your zone.
The shorter your growing season, the earlier you need to start or sow your seeds.
To find the best time to plant, we recommend checking the Almanac’s recommendations. You can use this helpful planting calendar to figure out the best time to plant fall vegetable garden plants in your location.
Most vegetables that grow in the fall can be directly sowed in late summer, but the harsher your winters, the smaller the window for planting.
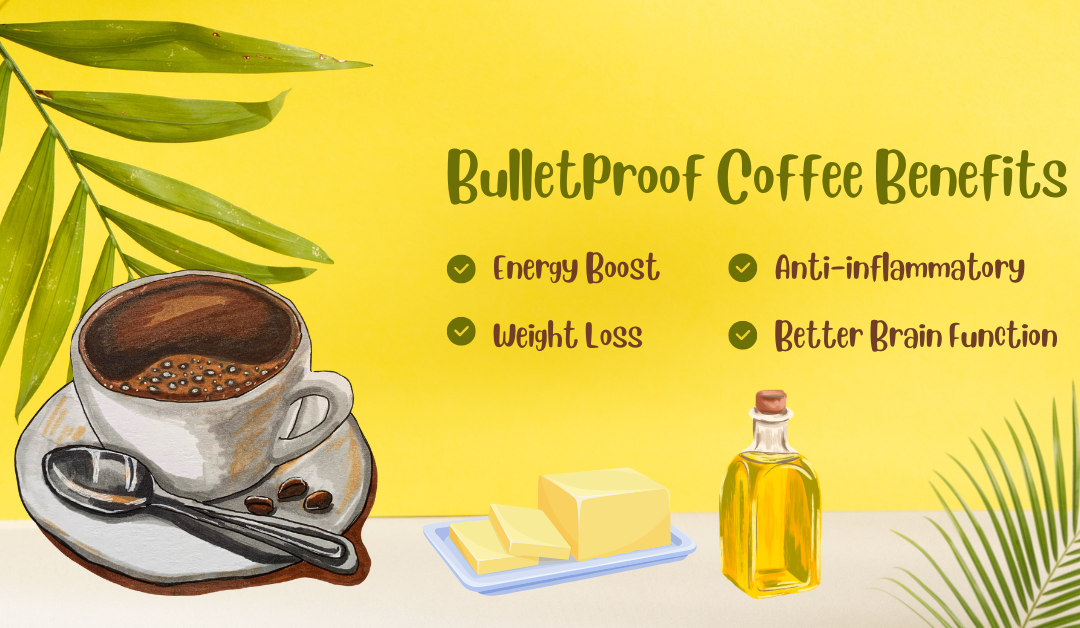
Changing out your morning coffee for something new doesn’t happen often. I mean: would you stop drinking coffee? I wouldn’t. But I am not opposed to trying something new, especially if it’s good for me. Bulletproof coffee is the new “hot” drink, and it actually tastes pretty good.
We’re going to look at bulletproof coffee benefits, explain why you may want to start drinking it and see if this drink is worth drinking instead of your morning brew.
But before we start, what the heck is bulletproof coffee?
What the Heck is Bulletproof Coffee?
If you’re envisioning coffee beans with a Kevlar vest on, you’re way off. Instead, bulletproof coffee is part of a diet, and the goal is to drink this coffee rather than eat your traditional, carb-filled breakfast.
This coffee consists of:
High-quality coffee beans
Unsalted butter
Coconut oil (or a medium chain triglyceride)
You brew up the coffee like normal, blend up the ingredients really well and end with a brew that is rather similar to a latte and really creamy.
It’s very important that you focus on quality ingredients when making your cup of coffee. You’ll want to focus on:
Organic, grass-fed butter
Good quality coconut oil
You won’t be adding any milk, so you’ll be drinking a black coffee, although you won’t notice it with the coconut oil and grass-fed butter mixed in.
Now that we’ve defined bulletproof coffee for you, let’s answer an important question: What are the benefits of bulletproof coffee?
Let’s find out.
4 Must-Read Bulletproof Coffee Benefits
1. Energy Boost Instead of a Crash
In the morning, most people eat breakfast foods that cause them to crash. A regular diet may consist of:
Pancakes
French toast
English muffins
Pop tarts
Cereal
And in the morning, everyone seems to be in a rush, so they’ll grab the absolute fastest thing to eat. No one is thinking about a balanced diet or their digestive health when they’re rushing off to work.
One of the most important bulletproof coffee health benefits is that you’ll feel filled with energy for longer. You don’t have to worry about feeling very energetic after eating only to experience a blood sugar crash shortly after.
As an alternative to breakfast, bulletproof coffee is rather impressive.
Of course, you get the jolt of energy from coffee, but research shows that the real energy booster comes from the omega-3 and omega-6 fats that:
Slow metabolism of the butter
Cause you to hold onto energy
Naturally protect against crashing
MCT oil also aids in energy retention and the boosting effects of bulletproof coffee. MCTs are metabolized quickly for energy, while butter will work to help you maintain energy stores. Without the carbs and sugar, you won’t experience the immediate energy boost followed by the “did I even sleep” feeling 30 minutes later with bulletproof coffee.
2. Encourages Weight Loss
Most of the bulletproof coffee benefits that you’ll read about online deal with the keto diet. People that follow this diet need to have high fat in their diet, and they want to remain in a state of ketosis.
Reduces side effects experienced with keto (i.e., keto flu)
Anyone on a low-carb diet who wants to find something to eat for breakfast should consider coffee with butter or ghee and an MCT oil. You can even have it after your morning workout without worrying about carbs being stored as fat, like what would happen with other breakfast foods.
Keto works for a lot of people because it uses body fat for energy and can help them improve their body composition.
In short: bulletproof coffee is a good breakfast substitute.
3. Anti-inflammatory Properties
Bulletproof coffee benefits also include anti-inflammation. MCT oils have been shown in studies to have anti-inflammation properties. The omega-fatty acids in the grass-fed butter also lend their own anti-inflammatory effects to your morning brew.
Optimizing the anti-inflammatory properties requires you to be very cautious of the ingredients that you put in your coffee.
In the ideal world, you’ll purchase ingredients that include:
Organic coffee
Grass-fed butter
Following an anti-inflammatory diet is something that a lot of healthcare professionals recommend, and it’s something you’ll want to discuss with your doctor, too. Inflammation is linked to many diseases and chronic illnesses, so being able to reduce it will improve your odds of living a happier, healthier life.
4. Boost Brain Function
Coffee boosts your brain function on its own. Caffeine is a natural stimulant, and studies show that it can:
Promote short-term brain function
Enhance focus
Improve mood
Boost reaction time
Caffeine also helps to stimulate your central nervous system, which will enhance your mood by producing more serotonin and dopamine.
It’s really important to note that the brain-boosting benefits are associated with caffeinated coffee in general and not just bulletproof coffee. In fact, people drink coffee before exams because it makes them alert.
Studies even show that caffeine also improves alertness and is a great way to limit depression while also boosting mood. And the people who say “drink coffee and you’ll never sleep” are also misinformed. The truth is that coffee only disturbs sleep in certain very sensitive individuals.
If you’re concerned that you may be one of the individuals that are sensitive to caffeine, simply try to cut down your coffee consumption five or six hours before bed and see how you feel. Sleep is so crucial to your health that you may want to skip out on coffee if you can’t sleep well at night after drinking a cup.
Does Bulletproof Coffee Break a Fast?
Anyone dieting and following intermittent fasting (IF) may want to know: will bulletproof coffee break a fast?
And the answer is all over the place.
Naturally, people who push products for dieting say that bulletproof coffee and intermittent fasting work great together because it won’t break your fast. However, this is simply not the case because any caloric intake will break a fast.
When you fast, the body will enter autophagy, or a stage where it cleans up toxins in the body and repairs the body. However, a few points to note here are:
Bulletproof coffee breaks your fast
If you’re following the keto diet, this coffee is keto-friendly
So, to clarify, one of the bulletproof coffee benefits that are completely false is that drinking this creamy latte won’t break a fast. If you don’t want to break your fast and need an extra jolt of caffeine, you can drink completely black coffee.
Butter coffee or anything with added oils or sugars may fit into ketogenic diets and help you maintain your energy levels longer, but it will break your fast.
Are There Bulletproof Coffee Benefits for Skin?
Yes and no. Many of the skin benefits that you’ll read about are not because you’re drinking this type of coffee. Instead, your morning cup of regular coffee offers a ton of skin benefits, such as:
Reduce acne
Lower inflammation
Protects the skin from UV-damage
Improves wound healing thanks to linoleic acid
Potentially reduces cellulite
Reduces under-eye inflammation
And most of these benefits are actually due to the chlorogenic acids and caffeine in the coffee.
If you’re upset that bulletproof coffee benefits for skin aren’t really a “thing,” you’ll want to read through our extensive article on coffee benefits for the skin. Many of these benefits are exactly what you’ll experience with bulletproof coffee, too.
P.S. there are also coffee benefits for hair that will have your hair looking its best in no time.
Wrapping Up: Benefits of Bulletproof Coffee
If you’re into creamy coffee drinks, there’s no harm in experimenting with bulletproof coffee benefits for yourself. People on the keto diet find that this type of coffee is a good substitute for breakfast and is worth drinking alongside regular coffee.
You can use the basic recipe above to experience the health benefits of bulletproof coffee, or you can find companies willing to sell it to you premade.
But for me, I prefer making my own because it’s cheaper and I know exactly what I’m putting in it.
Pregnancy takes your body on a wild ride. Your hormones are all over the place, and your body is going through so many changes every day. After all, it takes a lot of hard work and effort to grow a human. But there’s one thing that you may not have been prepared for: poor sleep. If you’re looking for tips on how to sleep better when pregnant, we have you covered.
But first, let’s talk about how much sleep you really need when you’re pregnant.
How Many Hours Should a Pregnant Woman Sleep?
When you’re pregnant, you’re not only eating for two, but you’re also sleeping for two. But how much sleep is enough?
Generally, you should aim for 8-10 hours of sleep during pregnancy. While it may be challenging to reach that goal, it’s important to try.
Inadequate sleep can cause problems down the road. One study found that pregnant people who got less than six hours of sleep were 4.5 times more likely to need a C-section. Their labor was also 10 hours or longer compared to those who got 7 or more hours of sleep.
As important as it may be, anyone who’s been pregnant will tell you that it’s not always easy to get a restful night of sleep.
To help you get a full night of sleep, we’re going to share some helpful tips on how to get better sleep when pregnant.
How To Get Better Sleep When Pregnant
Getting enough sleep in pregnancy can be challenging, especially during the first and third trimesters. Many people experience insomnia in early pregnancy, and in the third trimester, finding a comfortable position can be difficult (not to mention all of the middle-of-the-night bathroom breaks!).
It’s important to talk to your doctor about your disturbed sleep, but we’re going to share some tips that you can use to get more ZZZs now.
Take a Warm Bath
A little relaxation can go a long way in helping you get to sleep and stay asleep. Taking a warm bath before bed can help melt away stress and get into that sleep state of mind.
It’s important to stress the word “warm” here. Baths are generally fine to take during pregnancy as long as the water isn’t too hot (over 100 degrees Fahrenheit). You don’t want to soak in water that will raise your body temperature to above 102.2 degrees Fahrenheit, or 39 degrees Celsius.
So, stick to warm (not overly hot) baths. Play some soothing music, and just relax. If you have the time, try a guided meditation to calm your mind and body before bed.
Practice Relaxation Exercises
There’s so much going on during pregnancy that it can be difficult to relax. You’re excited about the future, but maybe you also have some anxiety about labor. Worries, fears and hormonal changes can make it harder to sleep.
If your mind is all over the place and it’s making it hard to sleep, there are relaxation techniques you can try to get your body and mind ready for bed.
Try these breathing exercises to help calm your mind and get your body into a relaxed state:
Inhale slowly, pause and exhale slowly. Focus on controlling your breath and the way it feels to breathe in and out.
As you inhale, feel your ribs expanding and your lungs filling.
As you exhale, feel your lungs emptying and your naval pushing in towards your spine.
Repeat for as long as you need or have time for.
Make sure that you’re inhaling and exhaling slowly. Taking quick deep breaths can cause you to hyperventilate.
To set the mood, try lighting an unscented candle and playing soothing music. Or just sit in peace and silence while breathing.
Practice relaxation techniques every evening before bed to help you get into a more relaxed state.
Try a Different Sleep Position
As you reach the third trimester, finding a comfortable position can be tricky. Experts recommend staying off of your back, especially during the third trimester. As the baby grows and your uterus becomes heavier, it can press down on the nerves in your spine as well as the major vein that transports blood from the lower body to the heart.
According to the National Sleep Foundation, pregnant people should sleep on their left side. Sleeping in this position can help improve the flow of blood and nutrients to both the baby and to your heart and kidneys.
But if you have an especially active baby at night, you may need to change positions every so often.
During the first trimester, it’s safe to sleep in any position you like because your uterus is still so small that it shouldn’t interrupt your sleep patterns.
Use Pregnancy Pillows
If you’re having sleepless nights because you can’t get comfortable, pillows may help.
Invest in some extra pillows and place them:
Between your knees
Behind your back for support and pain relief
Under your baby bump
You can use a regular pillow in each of these spots.
Of course, you can also use a body pillow that’s made for pregnancy. These U-shaped pillows make it easy and comfortable to sleep on your side because they cradle you. They wrap around your body to provide support for your back, and you can place the bottom of the pillow between your knees for added hip support.
There are other types of pregnancy pillow shapes, too, like wedges and waist pillows. Find the shape that works best for your body type and comfort level.
Work on Your Sleep Hygiene
Practicing good sleep hygiene is also important during pregnancy. Creating the right environment and mindset is key. Here are some tips to improve your sleep hygiene:
Keep the room cool and dark at night. Blackout curtains or sleeping masks can help block out light. The ideal room temperature for sleeping, according to experts, is about 65 degrees Fahrenheit.
Set a consistent bedtime and prioritize sleep. Remember that you need about 8-10 hours of sleep per day, so make it a point to go to bed earlier.
Take naps earlier in the day so that they don’t interfere with your nighttime sleep.
Do something relaxing before bed, like read a book, take a bath or practice deep breathing.
Avoid eating spicy foods or anything too heavy before bed to reduce the risk of acid reflux.
Exercise regularly (with the okay of your doctor) and earlier in the day.
Drink plenty of water during the day, but cut back in the evening to minimize bathroom trips.
The most important thing is to be consistent. Create an environment that promotes restful sleep and prioritize rest. Your body is hard at work creating new life, and that takes a lot of energy. So, give your body the much-deserved rest it needs to work its magic.
Eat Bland Snacks
A nighttime snack may help you get to sleep more quickly. But it’s important to make sure that you’re eating the right foods.
Try eating bland snacks and avoid sugary food before bed. It’s also best to avoid snacks that are spicy, fried or caffeinated.
Here are some great before-bed snack ideas:
A light snack of wheat crackers, low-fat cheese and a few pieces of fruit
Low-fat yogurt with toast
Oatmeal or soup
If you’re dealing with morning sickness, bland snacks are ideal. Make sure that your snacks really are snack-sized. Eating too big of a meal before bed may cause indigestion or make it harder to get comfortable and fall asleep.
Disconnect Hours Before Bedtime
One of the best things you can do to improve sleep during pregnancy is to disconnect from your phone and other screens.
Smartphones and computer screens emit blue light, which makes it harder for your body to get ready for sleep. Blue light actually blocks melatonin, the hormone that makes you feel sleepy and regulates your circadian rhythm.
Plus, the bright light from phones and TV screens makes it harder to get into that relaxed state for sleep.
You don’t have to disconnect for the entire evening. Just aim to stop using electronic devices about 30 minutes before bed.
Final Thoughts
Use these tips on how to get better sleep during pregnancy and enjoy more hours of sleep. It’s important to remember that you’re sleeping for two. Lack of sleep will not only affect your mental health but will also affect the health of the baby.
Make sure that you’re getting enough rest at night, and if you’re really struggling with your sleep schedule, talk to your doctor about using a safe sleep aid.
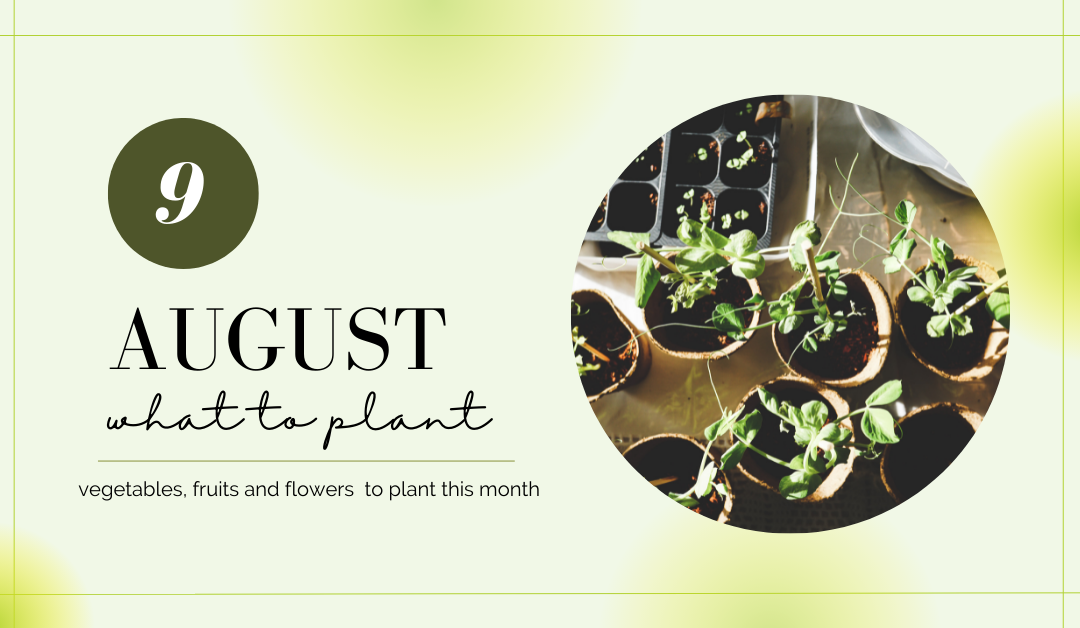
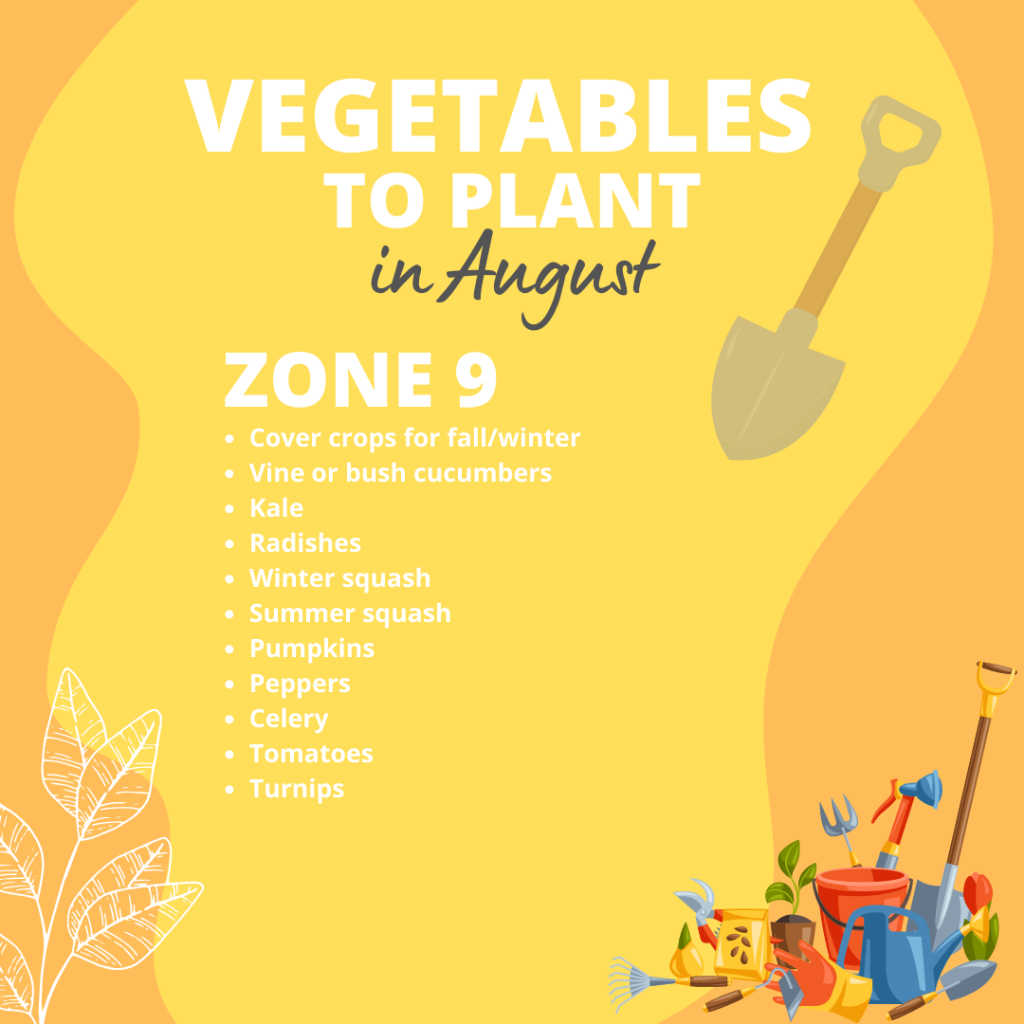
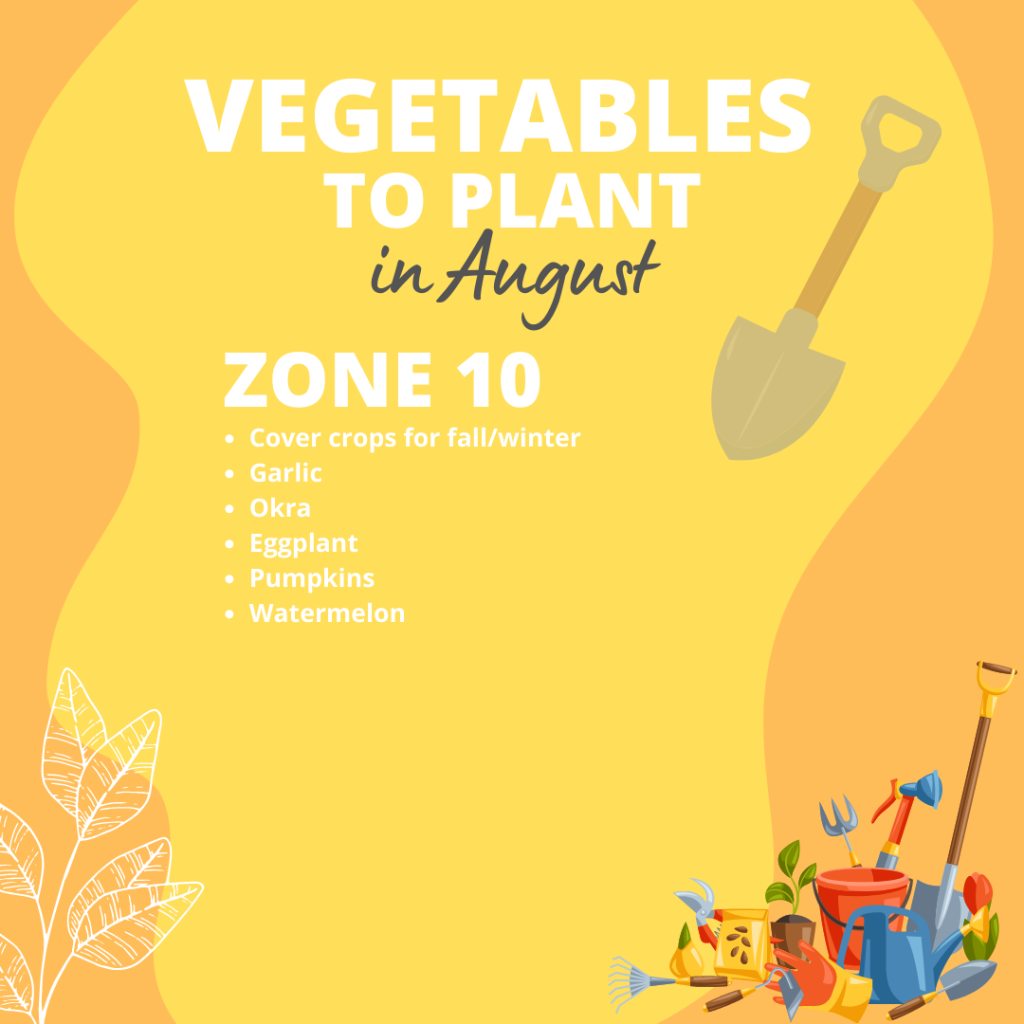
As summer winds down and we get closer to August, it’s time to start thinking about your fall garden. Even though August is one of the hottest months of the year for many of us, it’s a great time to start planting some vegetables that will be ready for harvest in the fall. You can plant flowers and fruits, too.
Here’s what to plant in August.
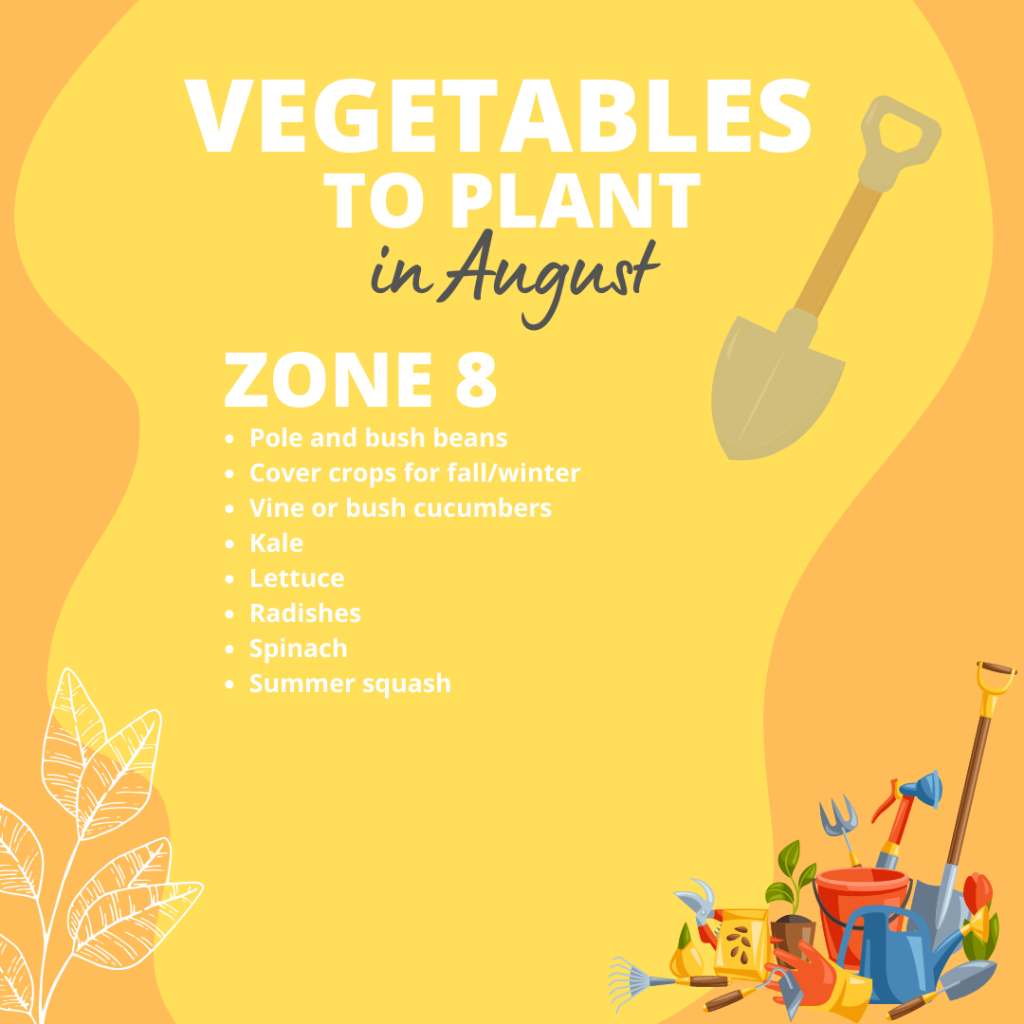
What Vegetables to Plant in August
Not sure what to plant in August for a fall harvest? We have you covered. Let’s look at what veggies to plant in August to get your fall garden started off right.
August is also a great time to start some seeds indoors for early fall planting, including:
Broccoli
Cabbage
Beets
Cauliflower
Carrots
What Fruit To Plant In August
Fruit trees can be planted at any time during the growing season. However, many gardeners agree that fruit trees are best planted in late winter or early spring.
Fruit trees and shrubs take time to produce fruit, so don’t expect to start harvesting for at least a few years.
What Flowers To Plant In August
Not sure what flowers to plant in July and August? Here are some great choices that will have your garden bursting with color in the fall.
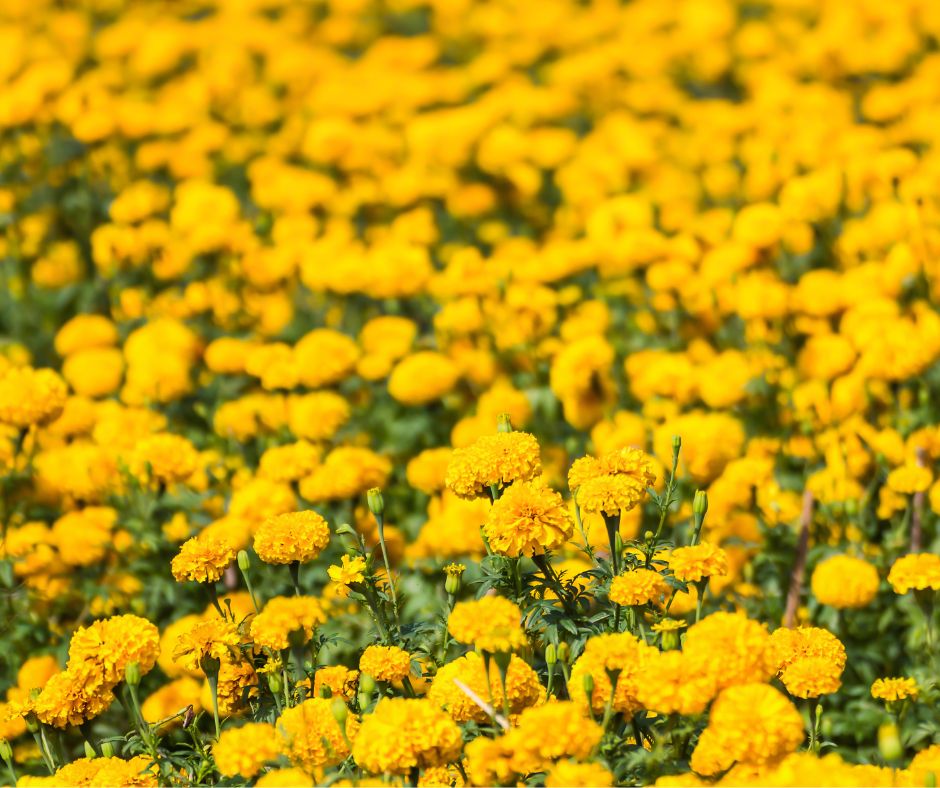
Marigolds
Marigolds are staples in many gardens for a reason – they’re beautiful and hardy. Plant them in August to enjoy blooms and their bright orange color until the first hard freeze.
Marigold can be planted in containers or garden beds. Add a few to pots on your front porch along with some gourds and other fall plants. Their orange and yellow colors make them the perfect complement to your fall décor.
Black-Eyed Susans
Add some cheer to your garden and plant Black-Eyed Susans this August. Some varieties are annuals, while others are perennials. Check the tag for this info before buying your plants!
You can plant either type in late summer. However, perennial varieties will return year after year with proper care, and they will give you gorgeous color from mid-summer through fall.
Chrysanthemums
August is a great time to plant your mums. Don’t wait too long to plant, or they may not return next year. Get them in the ground early in August for a great chance at them returning next year.
Mums will give you a spectacular show of color throughout the fall.
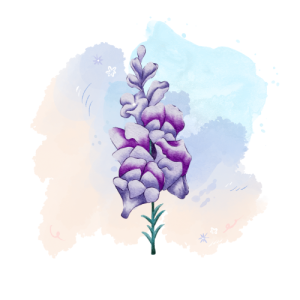
Snapdragons
Pollinators love snapdragons, and these colorful flowers don’t mind cooler weather. Plant them in August to enjoy bright colors throughout the rest of the season.
Add them to planters or garden beds that need a little refresh.
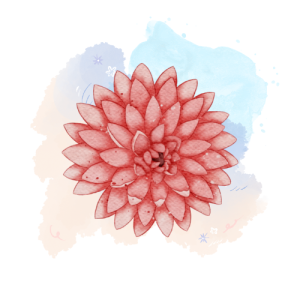
Dahlias
Dahlias are one of the most beautiful flowering perennials you can add to your garden. August isn’t the time to plant dahlia bulbs, but you can certainly plant potted flowers that are already at the peak of their growth. They will continue to bloom and give you a show well into the fall season.
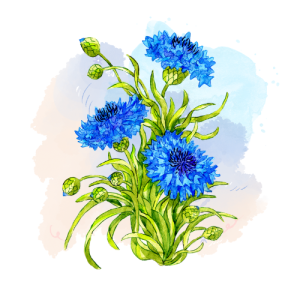
Cornflowers
With their striking periwinkle color, cornflowers add beauty and charm to any garden bed. August is a great time to sow cornflowers to enjoy blooms next May. These flowers grow well in virtually all zones.
Daffodil Bulbs
If you want to add daffodils to your spring garden, plant their bulbs in August or early fall. Late summer is ideal for cooler zones.
Perennials and Shrubs
August is a great time to plant flowering shrubs and many perennials. They’ll have some time to settle into their new home before fall, which is when they’ll take root.
Here are some great perennials and shrubs to plant this month:
Daylilies
Hydrangeas
Sedums
Lilies
Bearded iris
Peonies
Ornamental grasses
Just make sure that your new plants are well-watered. August is generally hot and dry, so watering is crucial to keep your plants happy and healthy.
2 Garden Chores for August
August is a busy month in the garden. Along with harvesting, you’ll be busy getting ready for fall and keeping your plants healthy.
Here are some other essential chores to tackle for the month of August.
1. Weeding
No one likes weeding, but if you’ve been putting this chore off, August is a great time to tackle it. Now that the growing season is starting to wind down, weeds will start producing tons of seeds. If left unchecked, they’ll grow out of control next season, making your life even harder.
Wait until after a good rainstorm to weed. The soil will be moist, making it easier to pull the weeds out of the ground. Make sure that you remove the root, or they’ll just regenerate. Once you remove the weeds, lay down a layer of mulch, compost, straw or leaves to keep growth in check.
2. Get Harvesting and Watch for Pests/Disease
Make sure that you’re harvesting your fruits and vegetables regularly this month to keep your plants producing.
Keep an eye out for pests, like:
Tomato fruitworms and hornworms
Thrips
Snails
Scale
Spider mites
Slugs
Chinch bugs
Watch out for bigger pests, too, like rabbits and groundhogs. These cuties can wreak havoc on your garden, so keep an eye out for them.
The hot and humid month of August also creates just the right conditions for disease, so be watchful for signs of disease. Remove diseased foliage ASAP to keep it from spreading in the garden.
Don’t put diseased plant parts in your compost pile, as they will continue to spread and make their way into the soil when you use it later on. Also, be sure to disinfect your garden tools when cutting diseased plants. Disinfecting them will help prevent spreading.
August is a busy time of the month in the garden, but you can still get some planting in. Use this helpful guide to know what to plant this month for a happy harvest in the fall.


 Marigolds
 Black-Eyed Susans