Whether you’re saving your own seeds or buying them from a trusted supplier, it’s important to ensure that you’re storing them properly. Proper storage will help preserve seed quality and viability. But what is the best way to store seeds? How long do seeds last? Here’s what you need to know about seed storage.
Best Way to Store Seeds for Long Term Storage and Next Year’s Planting
Whether you only need to store your seeds for next year or the long term, creating the right environment for your seeds is crucial.
Let’s look at the best conditions for seed storage and how to prevent disease.
The Best Conditions for Storing Seeds
Seeds are best stored in:
Cool temperatures
Airtight containers
Dry, dark places
A cool, dry basement is ideal for seed storage because it typically has consistent temperatures below 60℉.
It may seem convenient to toss your seeds in the garage or garden shed, but outdoor temperature fluctuations can make them unviable. Keep your seeds away from heat and out of the sun.
Start with Completely Dry Seeds
You can have the best conditions for seed storage, but if your seeds aren’t completely dry before you store them, there’s a good chance that they’ll spoil. Always make sure that any excess moisture is removed before you tuck your seeds away for future planting.
Check out our guide on How to Dry Seeds to make sure yours are ready for storage.
Temperature & Light Conditions
You know that a “cool, dark” place is ideal for seed storage, but what exactly does that mean?
According to the USDA, the ideal storage temperature for seeds is below 50℉.
Dim or no light is ideal for storing your seeds.
Many household basements meet these conditions, but it’s important to make sure that the space is dry. Ideally, the humidity levels should be below 50%.
How To Store Seeds Long Term – Storing Seeds in the Freezer
The freezer is the next best thing if you don’t have a basement or other location that’s cold or dry enough for seed storage.
The refrigerator is another option, but the temperature fluctuates each time you open and close the door. Unfortunately, those fluctuations aren’t ideal for your seeds.
The freezer is one of the best options for seed storage because it will provide the most consistent temperature for your seeds. But before you toss your seed packet in the freezer, there are a few important things to do:
Make sure your seeds are completely dry. Toss a silica gel packet in with your seeds for a few days to remove all excess moisture.
Keep your seeds in airtight containers. If you’re not storing your seeds in an airtight container, then you may introduce moisture that can spoil your seeds.
If you store your seeds in the freezer, you’ll need to take a few extra steps to prepare them for planting.
Remove the seeds from the freezer and let them rest for 12 hours.
Do not open the container until after the seeds have rested and come to room temperature.
Preventing Disease
Pests are always a concern when storing seeds. If you’re keeping your seeds in the freezer, you don’t have much to worry about here. However, if you’re storing them in a basement or closet, then there’s a risk of pests and disease.
Here are a few tips:
Toss your seeds in the freezer for a few days to kill insect larvae.
Use an airtight container. Pests need oxygen, and an airtight container will rob them of it.
Use containers made of heavy-duty plastic, glass jars or metal to keep rodents away.
How Long Do Seeds Last in Storage?
With the right storage conditions, many seeds can remain viable for more than one year. Those stored in the freezer can last two to five years in some cases.
Short-lived seeds are best replaced every year. These include:
Parsley
Asters
Leeks
Delphinium
Onions
Phlox
Parsnip
On the other hand, some herb and vegetable seeds have quite a long life span, including:
With the right storage conditions and the right seeds, you can have seeds ready for planting for the next few years.
Expect A Few Duds
Even with optimal storage conditions, some of your seeds won’t be viable. Expect there to be a few duds. Even freshly harvested seeds are sometimes not viable.
Toss Any Seeds Past Their Prime
The quality of seeds declines over time, and eventually, some unused seeds won’t be viable. When storing your seeds, make sure that you write down the date of storage and the expiration date on the seed packet (if you bought your seeds).
If you have seeds that are past their prime, toss them or compost them.
What Causes Seed Degradation?
Seeds degrade naturally over time, but there are some factors that can speed up the deterioration, including:
High temperatures
High relative humidity
If seeds are stored in a warm, humid place, they attempt to come out of dormancy. Warmth and moisture can also promote bacterial growth and attract pests that can ruin the seeds.
Using the right seed storage box or container in the right environment can help prevent degradation.
Seed Storage Containers and Organization
There are so many seed storage ideas out there. The right one for you will depend on the volume of seeds you need to store and where you plan to store them.
Here are some of the most common containers used for seed storage:
Paper Envelopes
Photo albums
Mason jars
Metal boxes
Organizing Seeds
No matter which type of storage container you use, it’s important to keep your seeds organized. One simple way to do that is to keep your seeds inside the seed packets they came in and place them inside of a larger container.
You can also organize your seeds by:
Planting dates (spring, fall, etc.)
Plant types
Use rubber bands to keep similar seeds together. For example, if you have multiple varieties of kale, a rubber band is a simple way to keep these varieties together and easily accessible.
Seed storage doesn’t have to be complicated, but a little planning and preparation can go a long way in making your seeds last as long as possible.
You’ve harvested seeds from your best plants. Now what? Drying seeds is one of the last steps in your seed-saving adventure, but it’s arguably the most important. If your seeds aren’t fully dried out, you’ll wind up with a moldy mess. To save you from this disappointment, we’re going to share some of the most effective ways to dry seeds.
If you haven’t already, check out our post on How to Save Seeds to find out how to save seeds from popular garden plants.
How to Dry Seeds for Planting
Humidity and excess moisture can cause your seeds to rot. A proper drying process will protect the seed coat to improve germination rates and prevent rotting. When dried and stored properly, you’re more likely to grow healthy plants.
Let’s look at a few of the most effective methods for drying seeds and the importance of choosing the right types of seed.
Choose Seeds from Open-Pollinated Varieties
When drying seeds for planting, make sure that you’re choosing open-pollinated varieties. These plants produce types of seeds that are true to type. In other words, it will produce a seed that is very similar to its parent plant.
Hybrid plants are created through careful and intentional cross-pollination of two parent varieties with desirable traits. While seeds from these plants can be saved, they won’t be true to type.
So, before you even get started on your drying venture, make sure you’re choosing the right seeds for the job. Now, on to the best practices for drying seeds.
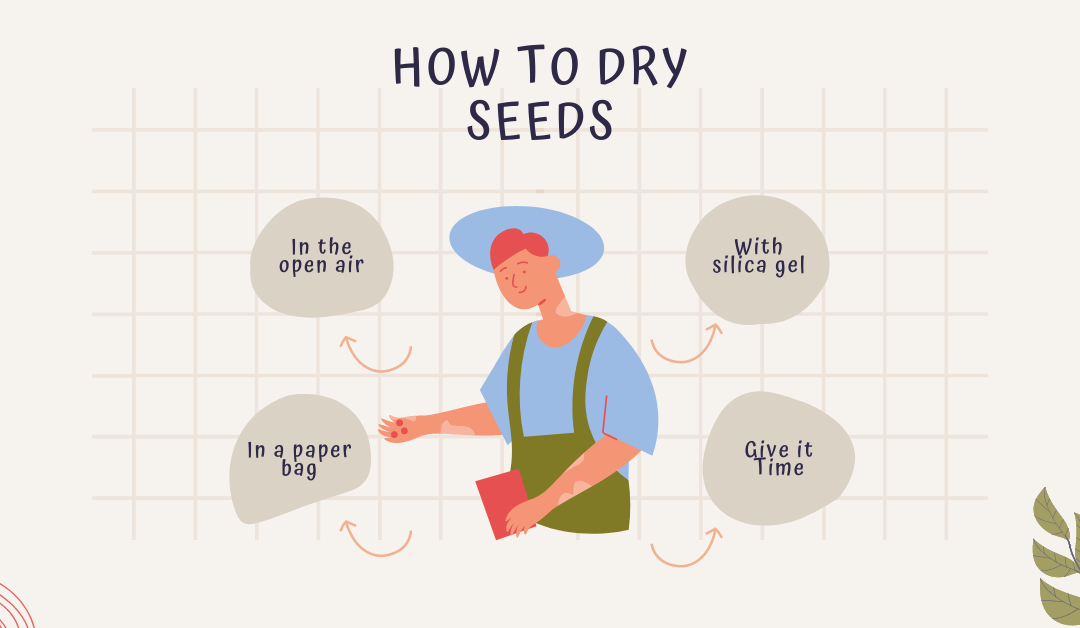
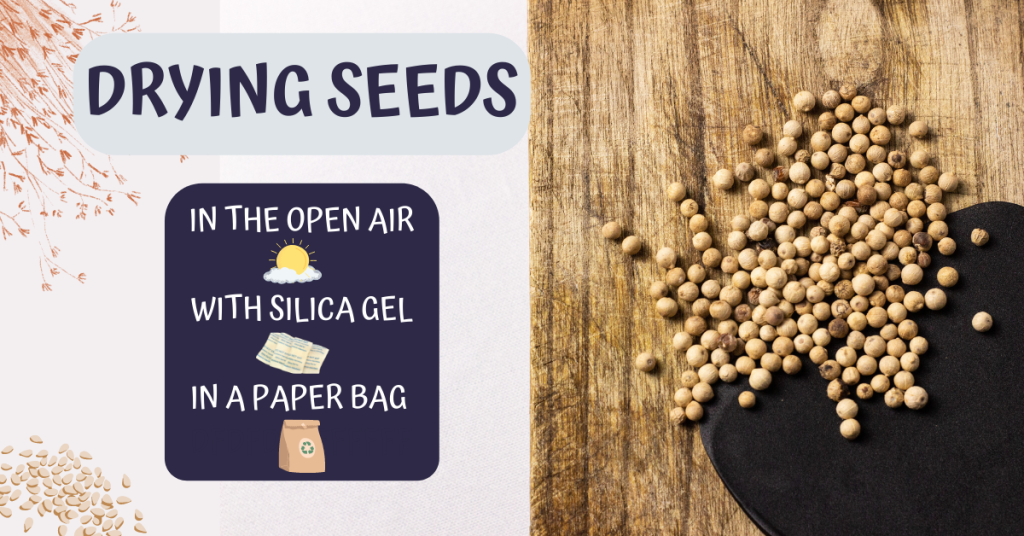
Dry Seeds in Open Air – But Give it Time!
The simplest way to dry seeds is out in the open air. Typically, seed savers will keep their seeds on a paper towel or clean plate (paper preferably).
When you dry out in the open air, moisture levels naturally decline over a few days. After you’ve harvested and prepped your seeds for drying:
Lay your seeds out on a paper towel or coffee filter. If your seeds are wet (e.g., tomato seeds or pepper seeds), stick to paper plates or coffee filters. Otherwise, they’ll stick to the paper towel. Screens also work well for drying, as they allow airflow all around the seed.
Make sure your seeds are spread out. You want proper airflow between your seeds. If you’re drying larger seeds (like pumpkin seeds), you may need a few plates or paper towels to spread out your seeds properly.
Keep them in a cool, dry place.
After a few days, move the seeds around to break up clumps of seed and uncover any seeds that have less air contact.
Allow your seeds to dry out over 2-3 weeks fully.
After a few weeks, your seeds should be dry enough to be stored away for next year. You can store them in airtight containers or a seed packet.
If you’re drying wet seed, like those from tomatoes or peppers, it’s important to make sure they are dry within a few days. Otherwise, they may start sprouting.
Dry Seeds with Silica Gel
If you want to speed up the drying process or ensure that excess moisture is removed from your seeds before storage, silica gel is a great tool to use.
Seeds of Diversity recommends placing an envelope of your clean seeds and an envelope of silica gel in airtight containers for a few days. Doing this will help remove moisture from wet seed and excess moisture from the air, too.
You don’t want to leave the silica gel in with your seed packet for long-term storage. Silica gel can over-dry your seeds, so remove it after a few days. Keep your seeds stored in an airtight glass or plastic container until you’re ready to plant.
Dry Seeds in a Paper Bag
Another effective way to dry out your seeds is with a simple brown paper lunch bag. This drying process works best for drying seed capsules and seed pods.
We don’t recommend using the paper bag method for drying wet seeds. But it does work well for drying seeds from flowers and dry vegetable seeds, like spinach, carrots and lettuce.
Here’s how this method works:
Place the flower stalk in the brown bag, head-first.
Keep the open paper bag on a tray or table to dry out in a dry, cool room.
Allow the seeds and stalk to dry out completely over two to three weeks.
Once the stem has dried out and turned brown, you can use your fingers to separate the seeds.
Remove and discard any chaff, petals other plant parts.
Leave the collected seeds in the bottom of the bag to dry out for another two to three weeks. Shake the bag occasionally to stir up the seeds.
Give Your Seeds Time to Dry
One of the most difficult parts of drying out seeds is waiting. While we’re all anxious to store away our seeds for next year’s planting, it’s important to be patient and wait for them to dry out fully. Doing so will ensure that your seeds are fully dry and ready for planting next year.
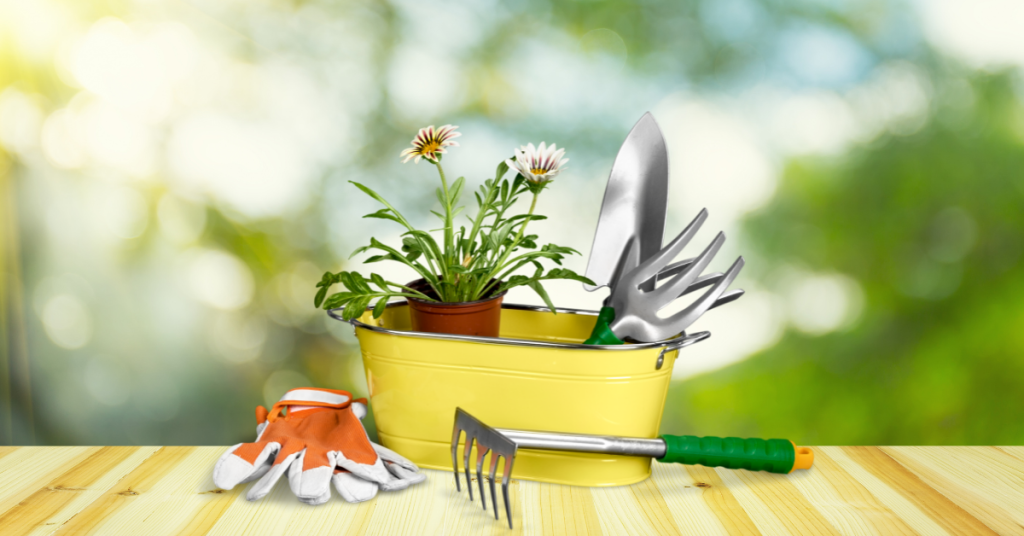
Vegetable gardening is rewarding. It’s hard to beat the satisfaction of planting a seed (or seedlings!), caring for it and enjoying the fruits of your labor – literally. But many people who want to get into gardening are intimidated. Apart from the growing itself, they worry they’ll have to invest a lot of money in vegetable gardening tools with no guarantee of return.
But I’m here to say that that’s simply not true. You don’t need much to start gardening.
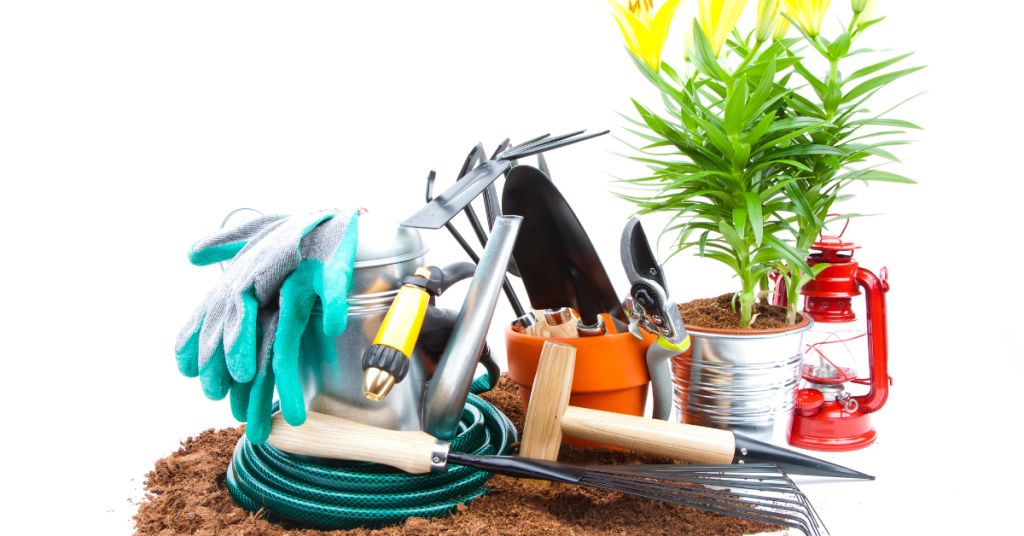
I know what you’re thinking, “Well, what kind of tools do I need for vegetable gardening?” I’m going to share a list of the most essential tools, and some that are just nice to have but not necessary.
A simple watering can makes it easy to water plants anywhere in your yard. If you don’t have a hose or can’t use a hose for whatever reason, a trusty watering can will get you through.
Look for a can that’s easy to carry even when full. Ideally, your watering can should be able to hold at least two gallons of water.
If you have the budget and space, consider getting a small water can, too. It’s much easier to water delicate herbs and plants in smaller containers with a smaller can.
A hose is another essential tool. It will save you a lot of time watering the garden and make it easier to ensure that your plants have all the water they need. Choose a hose that lets you adjust the intensity and type of spray. The “shower” setting is ideal for watering the garden because it won’t damage plants and mimics rainfall.
2. Hand Trowel
A hand trowel is an absolute essential for any garden because it has so many uses:
Look for a trowel that’s easy for you to use with a comfortable handle. If your trowel is too heavy, you won’t want to use it. Trowels with sturdy, narrow blades will easily cut into the soil, saving you time and effort.
3. Hand Fork
Another essential gardening tool is the hand fork. Hand forks are great for removing small weeds and roughing up the soil. It’s handy for both garden beds and container gardening.
Invest in a good hand fork with a strong handle and shaft. Quality tools are more expensive, but they will give you years of use.
4. Hand Pruners
A pair of pruners should be in every gardener’s tool kit. They make quick work of trimming plants, shrubs and even small tree branches. In a pinch, you can use them to harvest without damaging the plant.
We recommend bypass pruners for vegetable gardening. These pruners have a top blade that slices past the bottom blade for a quick and even cut.
When you’re searching for pruners, you’ll also find anvil pruners. With these pruners, the top blade chomps down to the bottom blade, which can damage the plant.
For vegetable gardening, stick with by-pass pruners. Look for a pair with a comfortable grip and sharp blades.
5. Garden Rake
If you have garden beds, a rake will save you a lot of time and help you maintain a healthy garden. Rakes with steel tines can help spread compost and break up the soil for easy planting.
In a pinch, a leaf rake can work for the same purposes, but eventually, you’ll want to invest in a good garden rake. The rectangular and compact rake head make it easy to work for your garden bed, and the thicker tines can work the soil more easily.
6. Long Handled Shovels and Spades
A hand trowel is great to have, but for bigger jobs, you’ll want a long-handled shovel and spade.
A straight-edge spade is great for digging holes, removing weeds, cutting roots and carving in edgings.
Long-handled shovels with round, pointed blades are great for moving soil around and digging holes.
Invest in shovels and spades made from forged metal for longevity. Keep in mind that the longer the handle is, the more leverage you’ll have.
7. Harvest Basket
There’s nothing more rewarding than harvesting your vegetables in the summer and fall. A harvest basket will make it easier to transport all of your goodies from the garden to your kitchen.
There are so many great basket options out there. You can choose a traditional basket, or you can opt for a plastic one with a colander base. The advantage of having a basket with drain holes is that you can wash your produce outside, keeping soil and dirt out of your pipes.
8. Hose Reel or Hose Hanger
Having to untangle a hose can be tedious and time-consuming. A hose reel or a hose hanger will make your life easier by keeping your hose organized.
We recommend hose reels if your garden is further away from your home. You can find reels on wheels that make it easy to wind and unwind your hose and bring it where it needs to go.
9. Harvest Scissors
Among all of the basic tools for gardening, harvest scissors are often overlooked. We consider them essential because they make harvesting quick and easy without damaging the plant.
You can also use these scissors for deadheading flowers or pruning very delicate plants.
Look for scissors with sharp blades and a comfortable handle.
10. Gardening Gloves
Last but certainly not least on our essential list of garden tools is gardening gloves. A good pair of gardening gloves is essential because you just never know what you’re going to encounter when working in the garden.
Gloves will protect your hands when:
Using fertilizer or laying down compost
Working with prickly plants or plants that may irritate your skin
Laying down mulch that may stain your hands
Gloves will keep dirt out of your fingernails and help prevent blisters and cuts when working with plants.
Make sure that you choose the right size for your gloves and that they feel comfortable when wearing them. Gloves with waterproofing are a bonus because they’ll keep your hands dry when working with moist soil.
Nice-to-Have Garden Tool List
Over time, you’ll find that your garden tool list keeps growing. In addition to the must-have, basic tools for gardening, there’s also a nice-to-have list.
Soaker Hose
A soaker hose makes your life easier by offering drip irrigation for your garden. You can easily move these hoses around, place them in a raised garden bed or even in a traditional garden. The idea is simple:
Soaker hoses have tiny pores – thousands of them
Water drips out of the hose slowly
Plants are slowly watered
Since you’re placing the hose near the base of the plant instead of spraying from above, more of the water reaches the roots.
Hoses come in multiple lengths, so whether your spigot is 25’ or 100’ from your garden, a soaker hose is available to meet your needs.
You still need to turn on your water spigot like normal, but you’ll find soaker hoses allow you to spend more time tending to your plants and less time watering them.
Using a soaker hose is more efficient, but it’s still not one of our essential vegetable gardening tools. It’s a fantastic addition, but you can still water your plants sufficiently with a hose while investing in some of the other items on our list.
Watering Wand
Do you have plants hanging or have difficulty watering near the base of your plants? A watering wand can help.
A watering wand:
Attaches to your hose
Is shaped like a wand
Water leaves the head of the wand
When tending to seedlings or hanging plants, a wand is much easier than a traditional hose. The water is dispersed more like a rain shower rather than a strong jet of water, so it’s perfect for young or sturdy plants alike. Most wands have a 45-degree angle, so you can get into tighter spaces, such as close to the base of the plant to reach the root system.
Compost Fork
Every garden can use a compost fork, and it looks a lot like a pitchfork. If you have a pitchfork, you can sub it for a compost fork. However, if you have compost for your vegetable garden, a compost fork offers:
Large forks
Sharp tines
Since compost may be difficult to mix, the sharper tines allow you to cut through thicker items in the compost pile and make it easier to turn.
Hori Hori Knife
A Hori-Hori knife is a type of gardening knife that comes from Asia. However, these knives are different from the gardening knife that you’re likely used to using. Instead, this knife mixes two tools:
Trowel
Knife
You’ll find that the Hori-Hori is more versatile than any one of these tools on their own and will make it easy to dig holes, cut down on weeds and even harvest. You’ll also find a few of these vegetable gardening tools with rulers printed on them to make it easier to dig holes for your plants with the appropriate depth.
Padded Kneeler
Do you find that kneeling down when gardening is killing your knees? You’re not alone. Padded kneelers are ideal if you like to kneel in your garden because they’ll alleviate pressure on your knees, making it far more comfortable tending to your crops.
Wheelbarrow
If you have the budget and space to store one, a wheelbarrow is a great investment for the garden. You can use it to haul soil or leaves, for weeding or collecting debris when you’re out in the yard.
Some wheelbarrows or garden carts can handle heavy loads, which is ideal for transporting rocks, bags of soil or other heavier items. Your back will thank you for buying a good wheelbarrow for your garden!
Garden Fork
A long-handled garden fork, or digging fork, is another handy tool to have in the garden. They make it easy to dig up weeds, remove dead or diseased plants and loosen up the soil. You can also use these helpful garden tools to transplant established plants to a new location.
Garden Hoe
Some gardeners consider a garden hoe one of the must-have garden tools. While I don’t personally think it’s essential, it can be helpful for removing shallow-rooted weeds. You can also use the tines to make little furrows for seeds. You’ll find garden hoes in a variety of sizes and shapes, so choose one that best suits your gardening needs. Look for ones with metal heads that are attached securely to the handle.
These are some of the best tools for vegetable gardening. To get started, you only need a handful of inexpensive tools. As you gain experience, you can start adding to your collection and investing in some of those nice-to-have tools.
Companion planting for vegetables is a strategy used by gardeners to naturally deter insect pests, attract beneficial insects and improve production. The goal is to place plant “friends” close together to benefit each other.
A simple example is planting nectar-rich flowers near your vegetables to attract pollinators. You can also plant two vegetable friends next to each other to repel or confuse pests.
One great example of companion planting at work is the Three Sisters trio – climbing beans, maize and winter squash. These crops were commonly planted together by Native American communities because they play amazingly well together.
The corn stalks are a natural trellis for climbing beans.
The squash shades the ground to improve moisture retention. Their prickly leaves deter weeds and pests.
The quick-growing beans served as nitrogen fixers to make more nutrients available to plants.
The Three Sisters trio is a prime example of how companion planting works. You may have also heard that you should plant tomatoes with basil. There’s a good reason for that. Basil is believed to repel pests, like hornworms, and even improve plant yields.
Placing plant friends together can help keep your vegetable garden healthy and thriving naturally. But when choosing companion plants, it’s important to remember that plants also have “enemies.” Just as some plants get along really well together, some plants can also work against each other.
The Benefits of Companion Planting
Planting plant friends together can benefit your garden in many ways. Here’s what companion planting can do for your vegetable garden:
Protect Against Insect Pests
Some plants naturally deter certain pests, which can benefit plants susceptible to those pests. For example, borage is a natural hornworm deterrent. Planting it near tomatoes can keep these destructive critters away.
Attract Beneficial Insects
Other plants can attract beneficial insects, like aphid-eating ladybugs or pollinating bees. Planting these attractors can introduce natural predators of pesky pests and ensure your plants are pollinated.
Add Soil Nutrients and Improve Plant Health
Many plants have beneficial relationships when it comes to soil nutrients. For example, some plants fix certain nutrients, like nitrogen, into the soil to make them available to nearby plants. Other plants can change soil biochemistry, creating more favorable conditions for plant neighbors.
Beans and other legumes make nitrogen more readily available in the soil.
Plants with long taproots can bring nutrients up to the surface to enrich the topsoil.
Add Shade and Suppress Weeds
Placing certain plants near each other can help suppress weeds and provide much-needed shade for some crops.
For example, tomatoes can provide some shade for lettuce to protect it from the hot sun and prevent bolting or wilting.
Sprawling plants like potatoes can suppress weeds by minimizing open space.
Serve as Natural Supports
Tall plants can also serve as natural supports for sprawling or climbing plants, like pole beans, peas and cucumbers.
As you can see, when you plan your garden layout with companion plants in mind, you can work with nature rather than against it. It’s no wonder companion planting is so important for an organic garden.
So, you know why companion planting is so beneficial and how it works. But which plants are enemies and friends? Let’s look at common vegetable garden plants and their best companions.
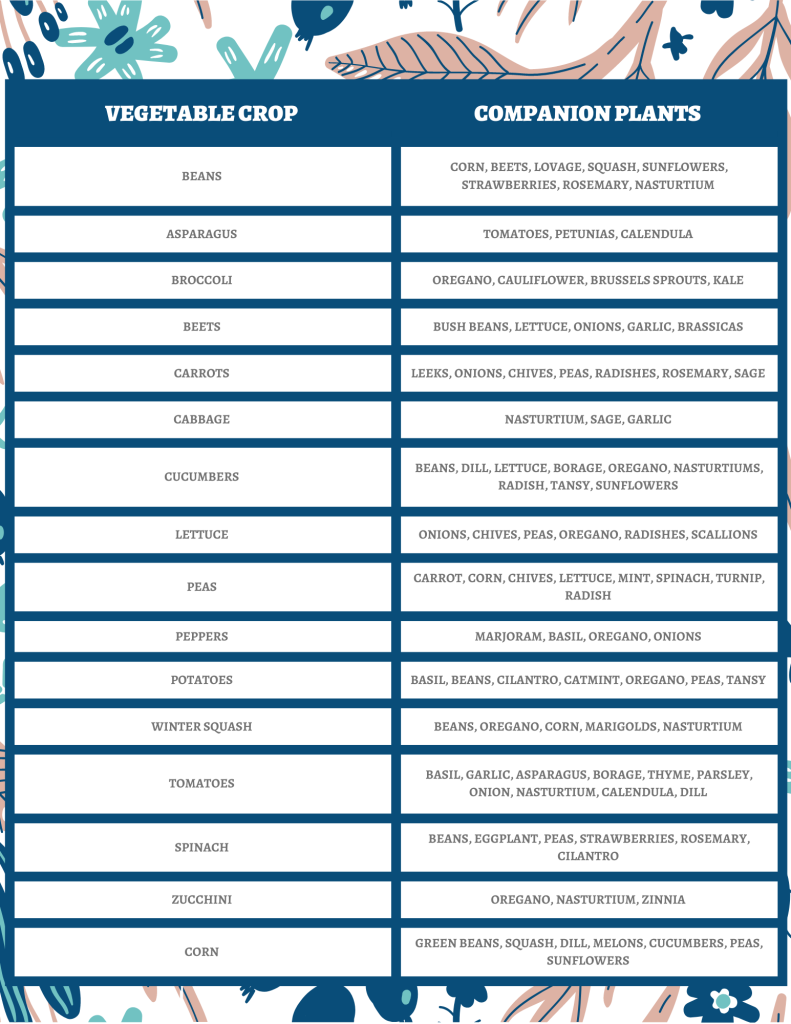
Companion Planting Chart For Vegetables
Here’s a handy companion planting chart for vegetables:
Green beans, squash, dill, melons, cucumbers, peas, sunflowers
Note: We covered the most popular garden vegetables. There are certainly more beneficial plant combinations out there, but there are just too many to list in one blog!
We’ve added a helpful printable of this chart to the end of this article! Check it out.
Flower Companion Planting for Vegetables
Companion plants don’t necessarily have to be other vegetables. In fact, some of the best companion plants are flowers and herbs. These include:
Marigold
You’ve probably heard that you should plant marigolds in your vegetable garden, and there’s a good reason for that.
Marigolds do a few things for your plants:
They attract pollinators, like bees and butterflies.
They attract other beneficial insects, like aphid-loving ladybugs.
They contain limonene, which naturally deters whiteflies.
Their roots secrete substances that kill nematodes.
Plus, marigolds are so easy to grow and add beautiful color to your garden.
There are few plants that marigold can’t complement. Some of its top companions include:
Tomatoes
Cucumbers
Potatoes
Garlic
Onions
Eggplant
Squash
Cabbage
Kale
Carrots
Nasturtiums
These beautiful climbing flowers attract caterpillars, which can help keep them away from your vegetable plants. They’re also great for luring blackflies.
As a bonus, nasturtiums are edible, so they can serve as an extra “herb” for your garden.
Basil
Basil is a wonderful companion plant. They can repel pests like thrips, but they also disorient the moths that lay tomato hornworms. Planting tomatoes and basil together can be highly effective at reducing armyworms. They also help attract pollinators that increase tomato production and flavor.
Sage
Sage is a great addition to any garden. It’s a perennial, so it will come back every year. And along with its culinary uses, sage can also protect your vegetable crops.
Sage helps repel carrot fly and cabbage moths.
Parsley
Like basil, parsley helps attract beneficial insects that pollinate or dine on pests. Plant them near tomatoes to help improve production.
Tansy
Tansy is the ideal flower to plant in your vegetable garden because it attracts pest-eating bugs, like ladybugs, and predatory wasps. But they can also repel some nasty pets, like cutworms. The great thing about tansy is that it’s a perennial, so it will return every year to help protect your garden.
Mint
Along with being a great herb for your kitchen, mint is a great plant for your garden. It naturally repels aphids, flea beetles, ants and other pests. Just make sure that you keep a watchful eye on this herb, as it can take over your whole garden.
Dill
Dill is another exceptional herb for the garden. It attracts ladybugs, which eat aphids, and spider mites.
Final Thoughts
Companion planting can help keep your garden healthy and make your life a little easier. Choose your plants wisely and plan out your layout to incorporate friendly plant pairings when planting your next garden.
Seed-saving is a centuries-old practice that helps you prepare for next year’s garden now. When stored properly, seeds saved from your garden can be planted the following year for a bountiful harvest – free of charge.
To succeed with seed-saving, you’ll need to choose suitable plants, harvest your seeds at just the right time and store them properly.
In this guide, we’ll show you how to save seeds for some of the most popular garden plants and the best ways to store them.
How To Save Seeds
Before we get into the specifics of saving seeds for each type of plant, we need to cover one important thing:
One of the first things you need to consider when saving seeds is whether the plant varieties are open-pollinated or hybrid. Heirloom varieties are open-pollinated, as are many other varieties. These are the seeds you want to save, as they will come true from seeds.
Because hybrids are created by crossing two parent plants, they won’t breed true. So, make sure you’re only saving seeds from open-pollinated varieties. If you grew your plants from seeds, check with the seller to see whether the variety is open-pollinated or hybrid.
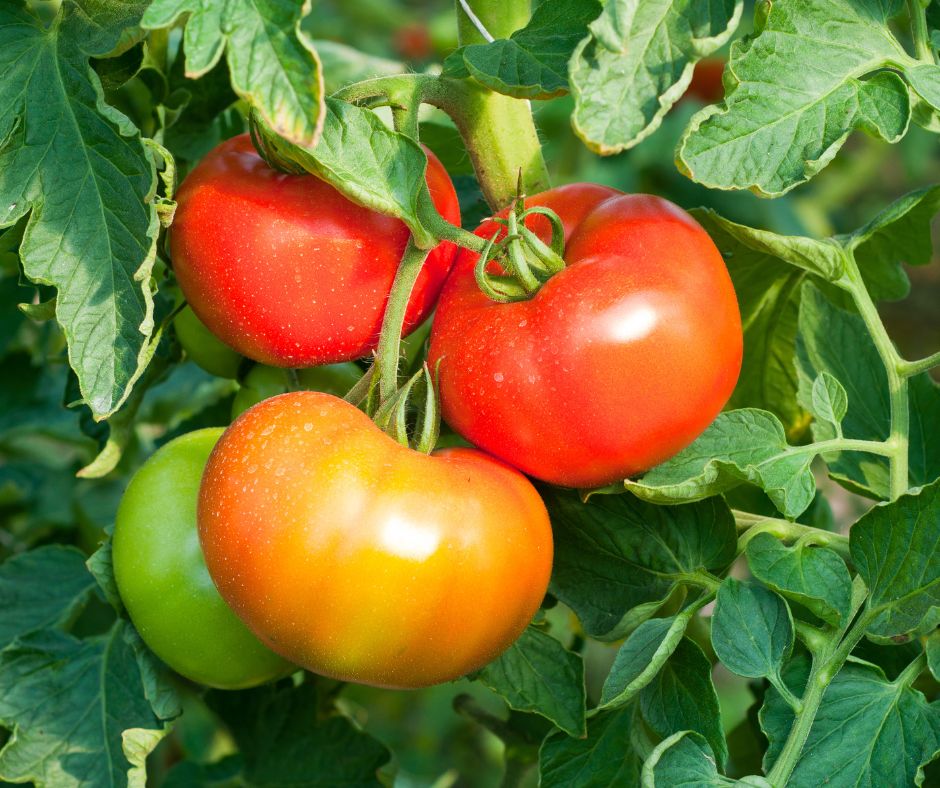
How To Save Tomato Seeds
When saving tomato seed, make sure you choose your best plants.
When we say “best,” we mean whatever you feel is best. It could be the biggest plant or the plant that produced the juiciest or most colorful tomatoes.
Avoid saving seeds from plants that struggled with disease or produced misshapen or under-ripened fruit.
For genetic diversity, save seeds from multiple tomatoes and, ideally, from more than one plant of the same variety if you can. Of course, you should only save seeds from ripe tomatoes.
Fermentation
While you don’t have to ferment tomato seeds, the process makes it a little easier to remove the seeds from the gel. It also helps weed out bad seeds and can reduce foodborne illnesses. If you plan to share your seeds with others, it’s considered a good practice to ferment them first.
How do you ferment tomato seeds?
Cut your tomato in half.
Squeeze or scoop out the seeds and gel.
Place the seeds and gel in a container labeled with the variety.
Add 1/4-1/2 cup of water to the container.
Set the container aside, away from the sun, for 3-5 days.
A moldy film may form, and that’s completely normal and okay.
To remove the seeds, first, carefully remove the film.
Add a little more water and stir.
Good seeds will sink, so gently pour off the water and bits of pulp floating at the top.
Repeat this process until all of the pulp is gone and your seeds are clean.
Drain, and spread your seeds on a paper plate or screen to dry out. Avoid using ceramic or plastic plates. The goal is to remove moisture from the seeds.
Don’t forget to label your plates if you’re saving seeds from different varieties. Tomato seeds are viable for years, so it’s well worth the effort to save seeds.
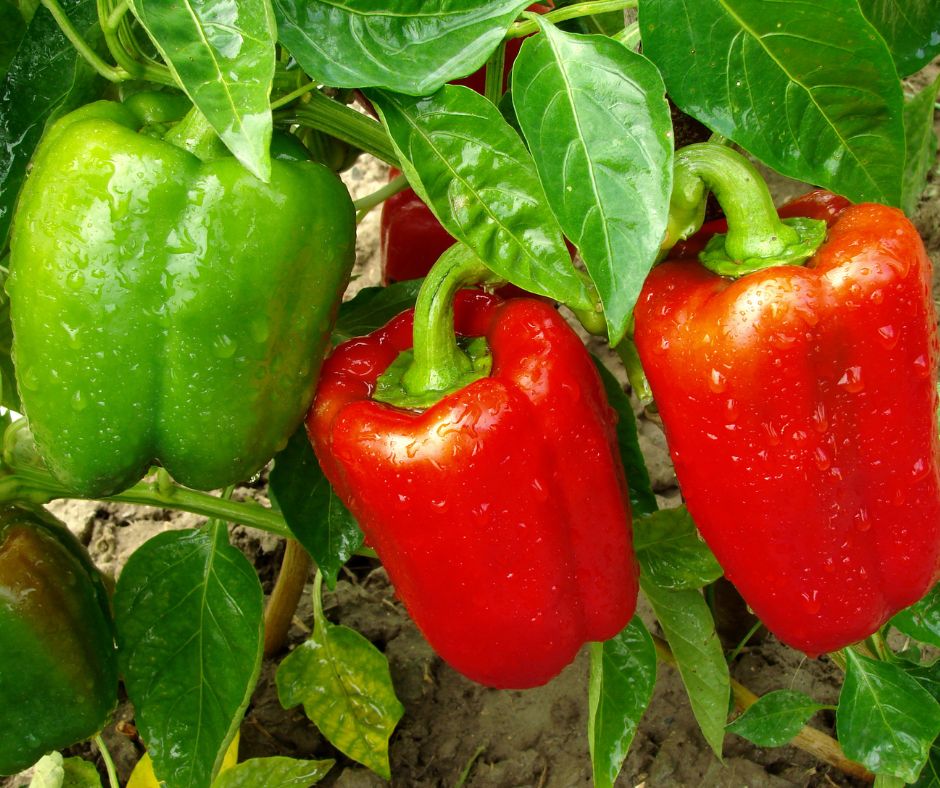
How To Save Pepper Seeds
Pepper seeds can be extracted using either a wet or dry process. Thick-walled peppers, like bell peppers, typically use a wet process. With thin-walled peppers, you can use either wet or dry.
Note: If you’re saving seeds from a hot pepper, take precautions to protect yourself from capsaicin. Capsaicin can irritate your eyes, skin and gloves. Make sure that you wear gloves, masks, goggles and a respirator when extracting seeds from hot peppers.
Like with tomatoes, you want to save seeds from the best plants.
Here’s the simplest way to save seeds from larger peppers:
Cut open the pepper and carefully scrape the seeds from the core.
Place the seeds in an ultra-fine mesh screen or strainer, and gently rinse to remove any leftover pulp.
Dry seeds. Coffee filters work well for the drying process. Make sure you place them in a warm, dry location that gets plenty of air circulation.
For thin-walled peppers, a dry process can work well for seed saving.
After harvesting your peppers for seed saving, allow them to dry out in a protected location.
The goal is to dry out the peppers until their flesh becomes brittle enough to break apart.
Once sufficiently dried, crush and rub the peppers in a larger container.
The dry process doesn’t work well for bell peppers and other thick-walled peppers because the fruit rots before it has a chance to dry out.
When properly dried and stored, your pepper seeds will remain viable for 2-4 years.
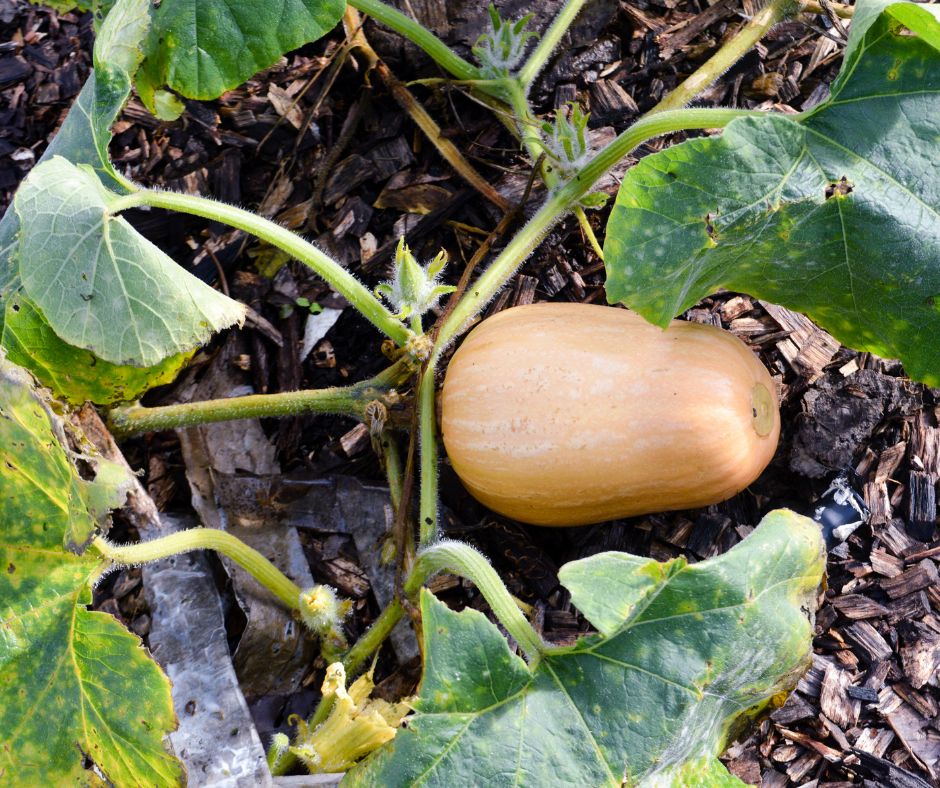
How To Save Pumpkin Seeds for Planting
Save seeds from your garden-grown or store-bought pumpkins to grow your own every year and have plenty of pumpkins to carve or eat.
Cut open the pumpkin to remove the seeds and pulp from the inside.
Place the pulp and seeds in a strainer.
Run cool water over the pulp, and start separating the seeds.
You’re going to have a lot of seeds – probably more than you can plant. Pick out the biggest and healthiest-looking seeds from the bunch to save. Plan to save three times more than you want to plant. You can roast the remaining seeds to snack on.
Take the seeds you want to save and place them on a dry paper towel. Make sure that the seeds are separated.
Place in a cool, dry place (a pantry works well!) for one week.
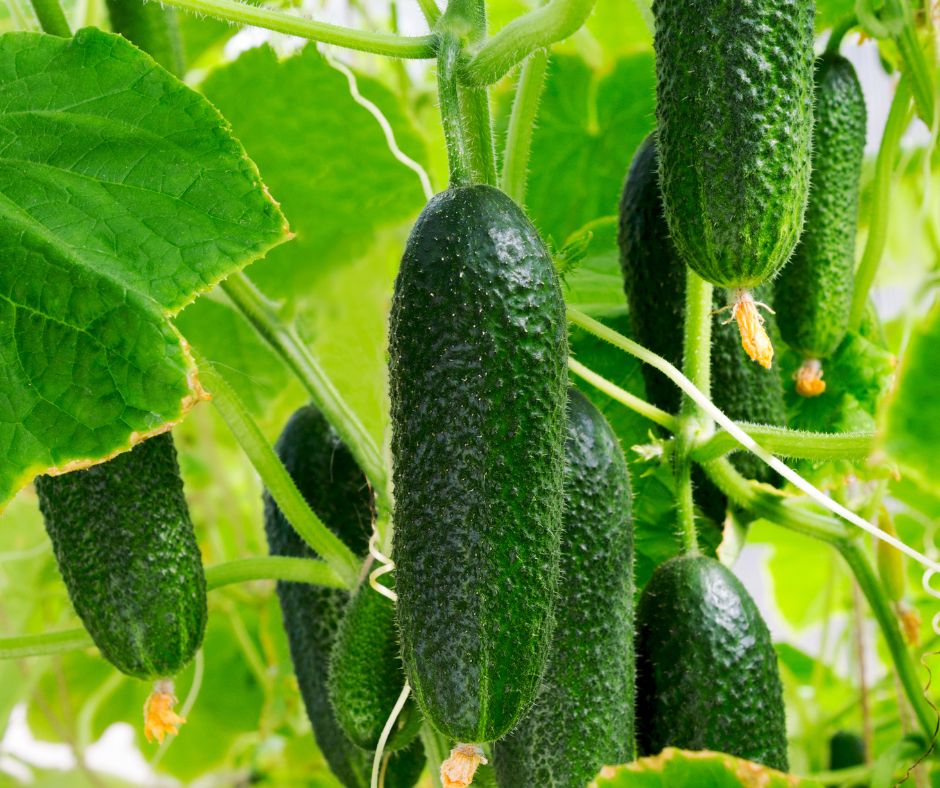
Saving seeds from heirloom cucumbers is very similar to saving seeds from tomatoes.
One important thing to note here is that because cucumbers require wind, insect pollinators or hand pollination, cross-pollination is possible. So, you may wind up with a mix of cucumbers when collecting seeds. If you’re serious about saving cucumber seeds, you should isolate the seed-saving plant from its cousins. For many gardeners, this really isn’t a practical option. So, be aware that cross-pollination may leave you with some weird results when you plant your seeds.
But what’s wrong with experimenting, right? Here’s what you’ll need to do to save your seeds:
Select cucumbers from disease-free plants and those that have the most flavor. Wait until your cucumbers are mature before harvesting seeds.
Cut your cucumbers in half lengthwise.
Scoop out the seeds and pulp.
Place the mixture of pulp and seeds in a small, clean container.
Cover the pulp/seed mix with water.
Allow the pulp/seed to ferment for 1-3 days out of the sun to separate the pulp from the seeds.
Once fermented, add more water, and stir.
The lightweight seeds and pulp will float to the top and can be removed.
Viable seeds will sink and should be saved.
Rinse the viable seeds clean and allow them to dry out on coffee filters.
How To Save Seeds from Squash
To save seeds from squash, you’ll follow the same steps as you would with saving pumpkin seeds. In fact, a pumpkin is a squash, so the process is exactly the same.
Cut open the squash.
Scoop out the pulp and seeds.
Place the seed/pulp mixture in a strainer.
Rinse with cool water, and begin picking out the seeds.
Save the biggest seeds, and roast (for snacking) or discard the remaining ones.
Lay the seeds you want to save on a clean, dry paper towel for a few days to dry out.
Store your seeds in an envelope for planting next year.
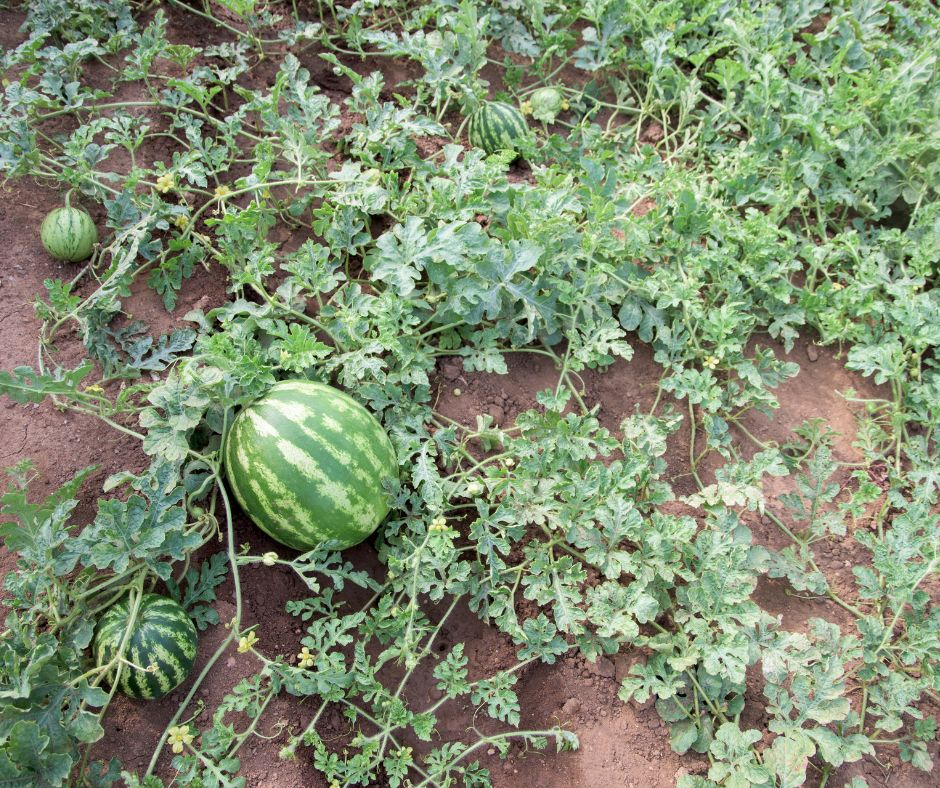
How To Save Watermelon Seeds
Saving watermelon seeds is easier than you think. It’s hard to beat a fresh, juicy watermelon from the garden, so it’s worth the time to save seeds from your best crop.
To save seeds:
Cut up the watermelon.
Collect the seeds in a bowl or cup.
Place your seeds in a strainer.
Rinse the seeds and remove any remaining juice and pulp.
Lay your seeds out on wax paper and allow them to dry for one week.
Once dried, store your seeds in a paper envelope for planting next year.
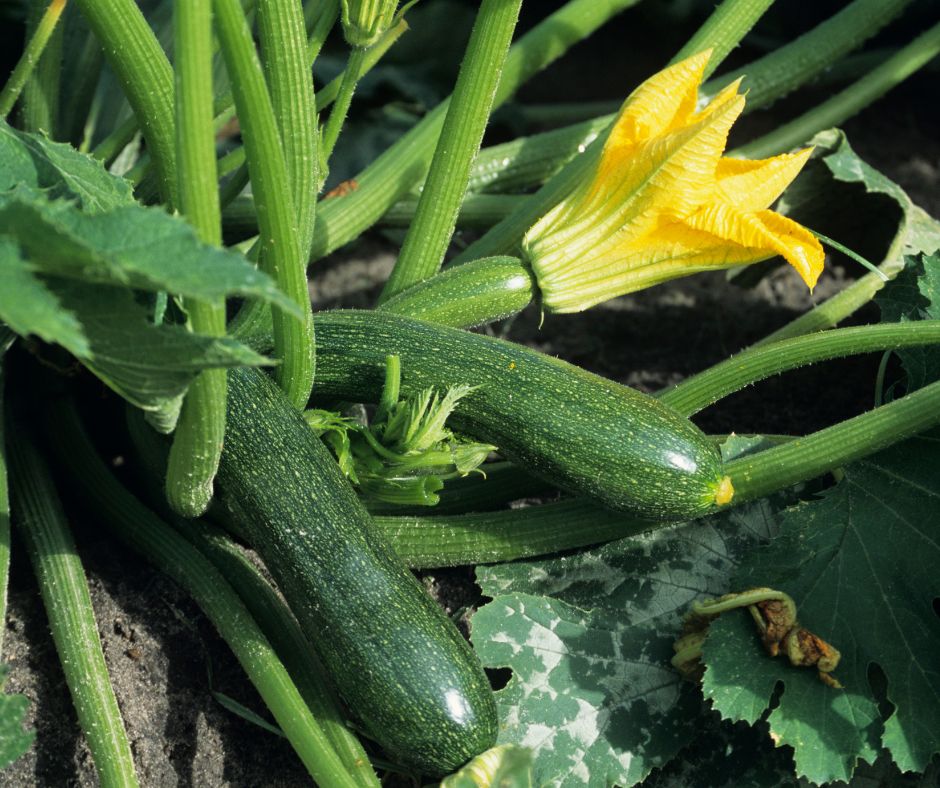
How To Save Zucchini Seeds
Saving zucchini seeds is a straightforward process, but you won’t be harvesting seeds from zucchini that you’ll be eating. In fact, the zucchini you know and love to eat is actually an immature fruit. If you want to save seeds from your plant, you’ll need to wait until you have mega zucchinis.
Wait until they are large and swollen and their skin is hard. The zucchini will be inedible, but you’ll be able to save the seeds.
To prepare the seeds for storing, you’ll use a similar method to tomato and cucumber seed saving.
Slice the zucchini in half lengthwise.
Scoop out the seeds and pulp and place them in a clean container.
Compost the rest of the zucchini.
Add just enough water to cover the seeds and pulp mixture.
Allow the seeds to ferment for 1-3 days.
Once fermented, add more water to the container to filter out the viable seeds. The pulp and unviable seeds will float to the top. Remove them. Viable seeds will sink to the bottom.
Rinse the viable seeds.
Lay the seeds out on coffee filters to dry.
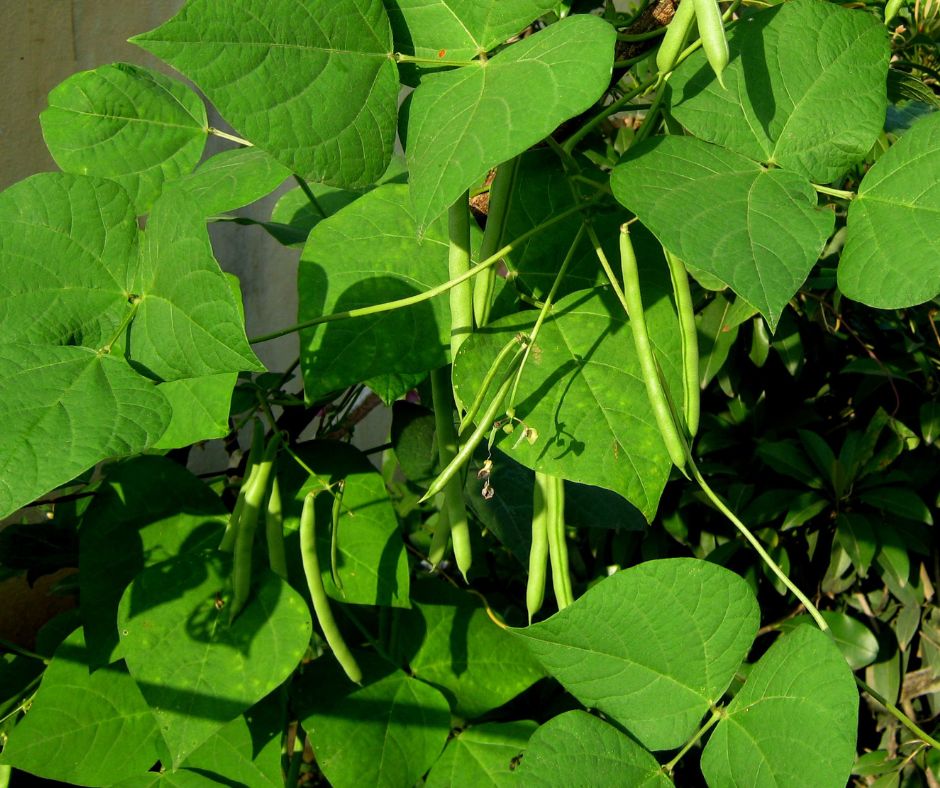
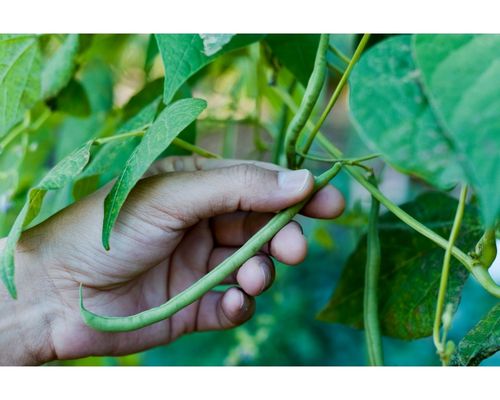
How To Save Green Bean Seeds
Beans are so easy to grow and a popular garden crop. The great news is that saving seeds from your green bean plants is easier than you think.
To save seeds:
Allow the green beans to ripen and dry out to the point where they are starting to brown.
At this stage, the seeds will be loose. In fact, if you shake the pod, you should hear them rattle. It can take a month or so to reach this stage.
Once fully dried out, you can harvest.
Remove the pods from the plants, and allow them to dry inside for at least two weeks.
At this point, you can shell the beans or leave the seeds inside of the seed pods until you’re ready to plant next year.
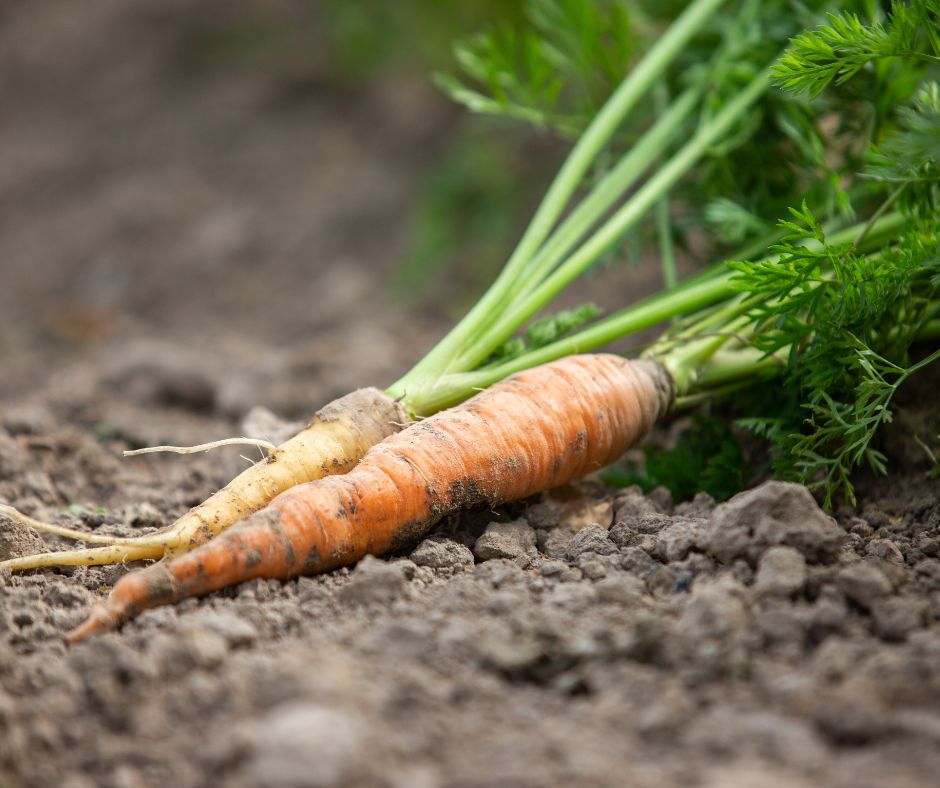
How To Save Carrot Seeds
Saving carrot seeds is worth the effort. Each plant can produce up to 1,000 flowers! That gives you the potential to grow a thousand carrot plants in the future.
Carrots are biennials, which means you’ll have to wait two years to harvest their seeds. To ensure that you get carrots that are true to their type, you’ll need to start the process in the first year.
One of the first and most important steps is to isolate your selected carrot plants from other varieties. Otherwise, pollinators may fertilize your carrots with pollen from other varieties, and you may not wind up with carrots that are true to type.
Vernalization
It takes two years for carrots to complete their reproductive cycle, and it’s the cold season that tells these plants to start reproducing. That cold period is called vernalization, and it’s what triggers the flowering needed to collect seeds.
If you have at least 10-12 weeks of temperatures below 59°F in your area, then you can easily overwinter your carrots in your garden (keep them in the ground).
For regions where the ground freezes, you can still keep your carrots in the ground if they are well mulched.
If it’s too warm or too cold in your area, you can harvest your carrots, trim off the greens and store them in a root cellar or fridge for the winter to mimic this cold state.
In spring, carrots that have been stored can be replanted at the same time you would normally plant carrot seeds. Only choose healthy carrots to replant. Some may not survive the winter. Any rotted carrots can be composted.
Keep your carrots three feet apart to give them room for growth in their second year. Watch for leafy flowers. Carrot flowers are umbrella-shaped with beautiful white flowers. They look similar to dill or caraway.
Allow the blooms to dry out. When the flower clusters have dried out in late summer, you can then harvest the seeds.
Experts recommend saving seeds from at least five plants to ensure enough genetic diversity and viable seeds.
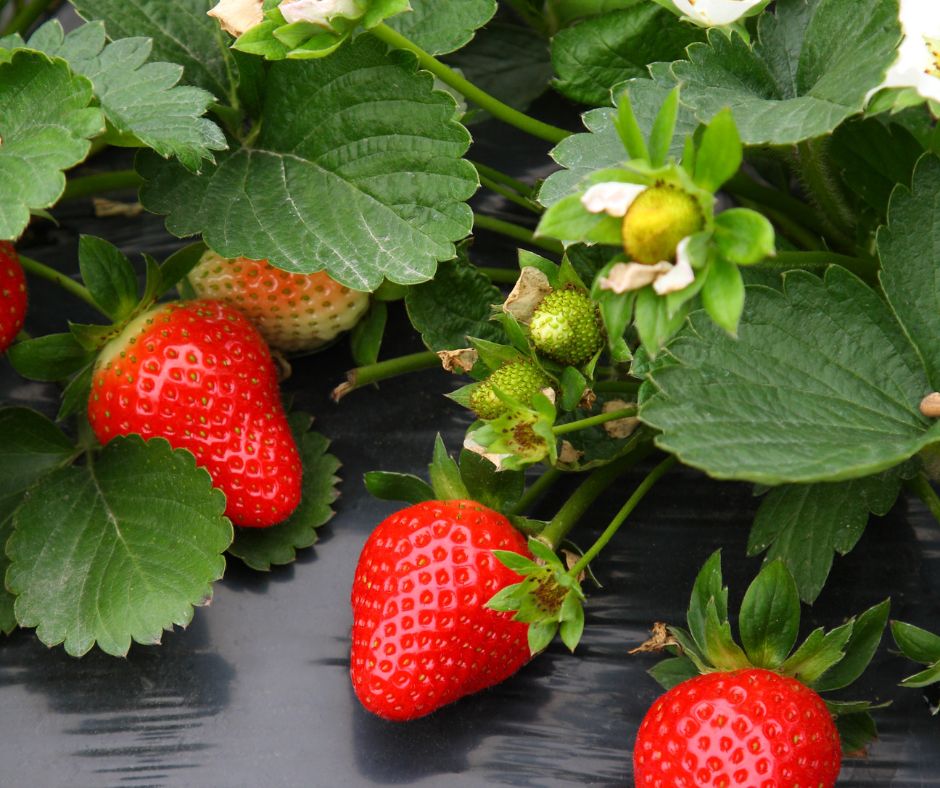
How To Save Strawberry Seeds
Unlike most other plants, strawberry seeds are on the outside of the plant. These perennial plants will continue to produce berries every year for three to four years. Saving seeds will help you grow your strawberry patch and keep it thriving for years to come.
Here’s how to save seeds from strawberries:
Choose ripe, healthy berries for seed saving.
To separate the seeds, place the berries in a blender along with a cup of water.
Blend for just a few seconds, and allow the mixture to sit for a minute or two.
Viable seeds will sink to the bottom.
Unripe seeds and the pulp will float to the top.
Carefully pour off the liquid.
Collect the high-quality seed, and gently rinse them off.
Lay the seeds out on a clean, dry paper towel to dry out.
Once dried out, your seeds are ready for storing and planting next year.
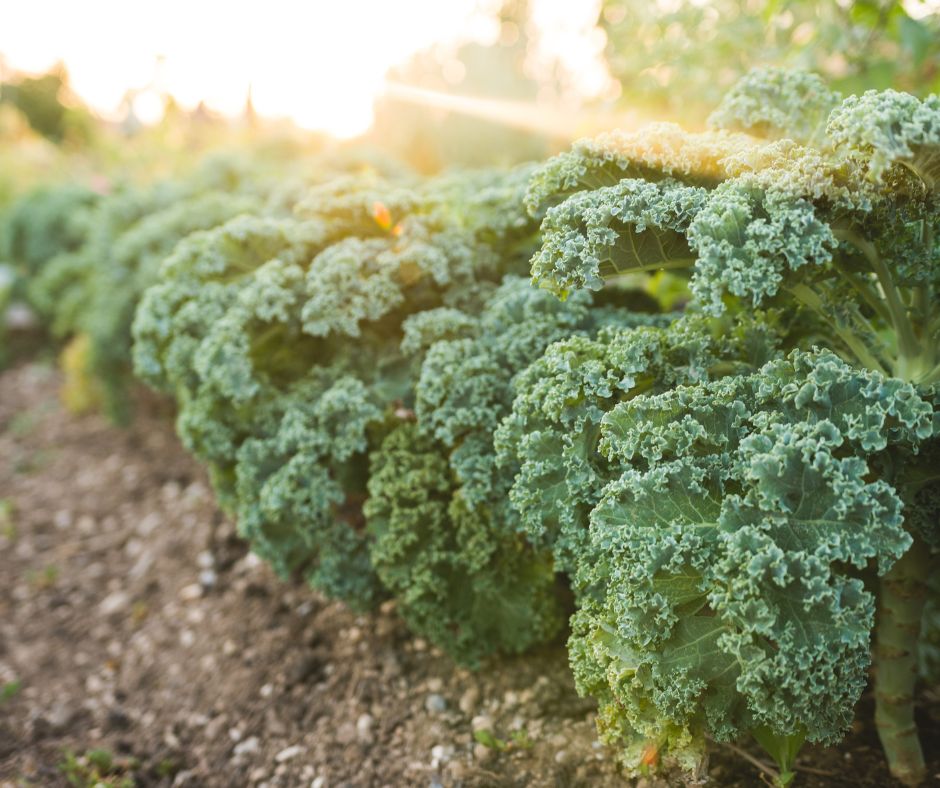
How To Save Kale Seeds
Like carrots, kale is a biennial plant, which means it takes two years to complete its reproductive cycle. In other words, your kale plants won’t go to seed until year two.
To get your kale plants to flower, you’ll need to let them overwinter. If you’re in zones 7-10, you can allow your plant to overwinter right in the garden and harvest leaves all season long.
But to keep your plants healthy, it’s important to lay down a thick layer (4”-6”) of mulch around your kale. You can use pine straw, leaf mold, grass clippings or even sawdust as mulch for your kale.
You can continue harvesting leaves in the spring. In summer, your kale plant will have completed its life cycle and will send out flower stalks. You can still harvest leaves at this time, but they won’t be as flavorful once the plant starts flowering.
Kale’s flower stalks can grow to be 3-5 feet tall. Once they finish flowering, the plant produces long, thin pods on its stalks. Soon after, they fade from green to a beige/brown color. Now is the time to harvest the pods. If you wait too long, the pod will burst open and release its seeds.
Cut the stalks down to the ground.
Invert the stems, and place the heads in large paper bags.
Hang the stalks in a cool, dry place away from wind.
It can take 10-21 days for the pods to dry out thoroughly.
Then, you can shake the bag to dislodge the seeds.
But you’re not done yet! You still need to go through a process called winnowing to separate your seeds from the chaff. Fortunately, winnowing is a pretty simple task. Use a screen with holes large enough for the seeds to fall through. Gently shake the seeds, and the chaff should be left on the screen.
Although it’s a bit of work to save kale seeds, one plant can easily produce hundreds of seeds.
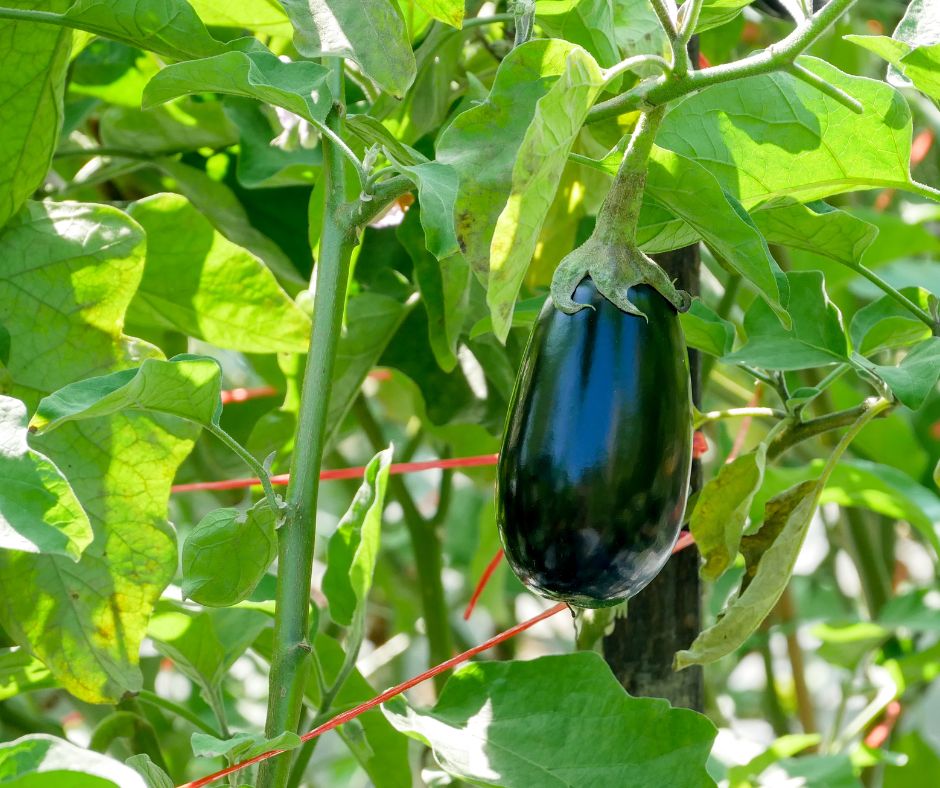
How To Save Eggplant Seeds
Saving seeds from eggplants is easy, but you’ll need to be patient. Before harvesting the seeds, you need to wait until the fruit is overripe to the point where it’s inedible. The eggplants you harvest for eating have immature seeds.
How do you know when your eggplants are overripe?
Purple eggplants will turn brown or tan
Green and white eggplants will turn yellow
Eggplants that are overripe will be hard with shriveled skin
To harvest seeds:
Slice open the eggplant.
Scoop out the seeds.
Fill a bowl with water and add the seeds.
Separate the pulp from the seed.
Strain the seeds and dry them with a paper towel.
Lay the seeds out on a tray or paper plate to dry out.
It can take 2-4 weeks for the seeds to fully dry out.
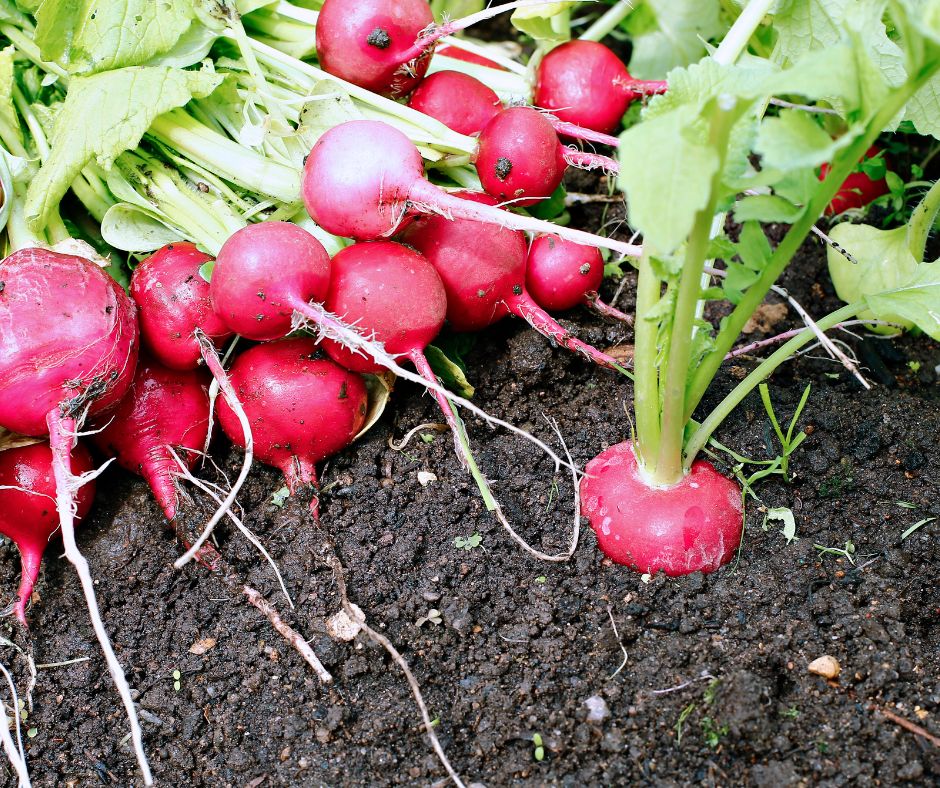
How To Save Radish Seeds
It’s easy to harvest radish seeds from your garden, but you’ll need to be patient and forfeit some plants in the process.
To collect seeds, you’ll need to let some of your radish plants bolt (flower). Your radishes won’t be edible at this point, but you’ll be rewarded with plenty of seeds to plant next year.
Radishes tend to bolt mid-summer when temperatures are at their hottest. Wait until the pods have turned brown and become brittle. In most areas, this happens around early to late summer.
Cut the branches with pods, and leave them to dry out on landscape fabric or a row cover in a sheltered spot. It typically takes 1-5 days for the pods to dry out completely.
You’ll need to separate the seed from the chaff to access the seeds.
How To Save Dill Seeds
Dill is such a great addition to the garden and great for companion planting to keep pests away. It’s a great herb to add to so many dishes, and its flowerheads add a bit of whimsy to the garden, too.
Another thing you’ll love about dill is that the seeds are so easy to save. And one flowerhead can produce a lot of seeds that you can use for pickles, soups, stews and more. Of course, you can use them for planting new dill, too.
Here’s how to save seeds from this flavorful herb:
The simplest way to gather seeds from dill is to let the plant dry itself out in your garden. Once the flowerheads have turned brown and become dry, you’re ready to start harvesting your seeds.
If you’re impatient, you can cut the blooms from the plant (wait until they’ve finished blooming), and place the stems in a paper bag, flowerhead-side down, to dry out.
Once your plants are dry, grab one of the flowerheads and a paper plate.
Gently rub the seeds off the ends of the stems. They should come off fairly easily now that the plant is dried out.
Repeat until you’ve gathered all of the seeds from your flowerheads.
It couldn’t be easier to gather seeds from dill, and you can use them however you want. You’ll likely have more seeds than you can plant, so don’t be afraid to add them to some of your favorite dishes.
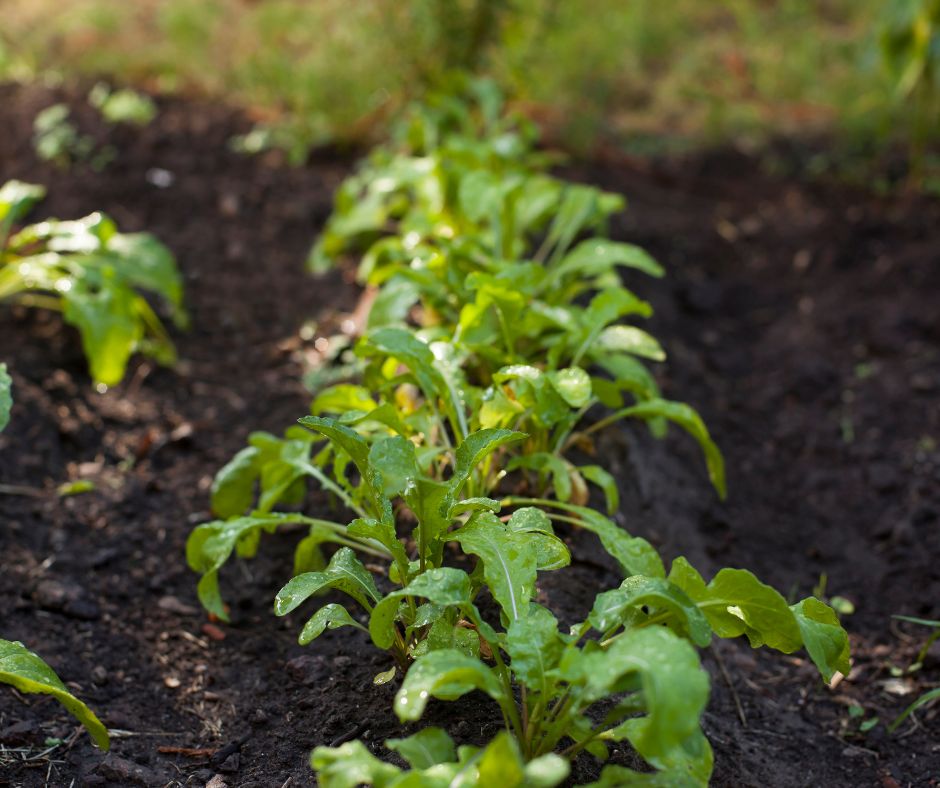
How To Save Arugula Seeds
Arugula is a wonderful, easy crop to grow in spring and fall. But in hot weather, it tends to bolt very quickly. When it bolts, it sends out little white flowers with pretty dark veins. Shortly after, arugula will form little seed pods along the stem. The seed pods are edible but very spicy.
At this stage, you’ll need to let your plants dry out.
Once your plant has dried out and turned brown, it’s time to clip the stems and bring them inside. You’ll know the plants are ready if you hear a rattling sound when shaking the pods.
Hang the plant upside down in a paper bag for about a week.
To harvest your seeds, you’ll need to do some threshing. You can gently shake the bag or crumble the seed pods to set the seeds free.
At this point, you’ll have some chaff mixed in with your seeds. You can remove the chaff by either blowing it off or using a sieve with holes bigger than the seeds.
Saving arugula seeds requires patience, but it’s a simple process that’s worth the wait.
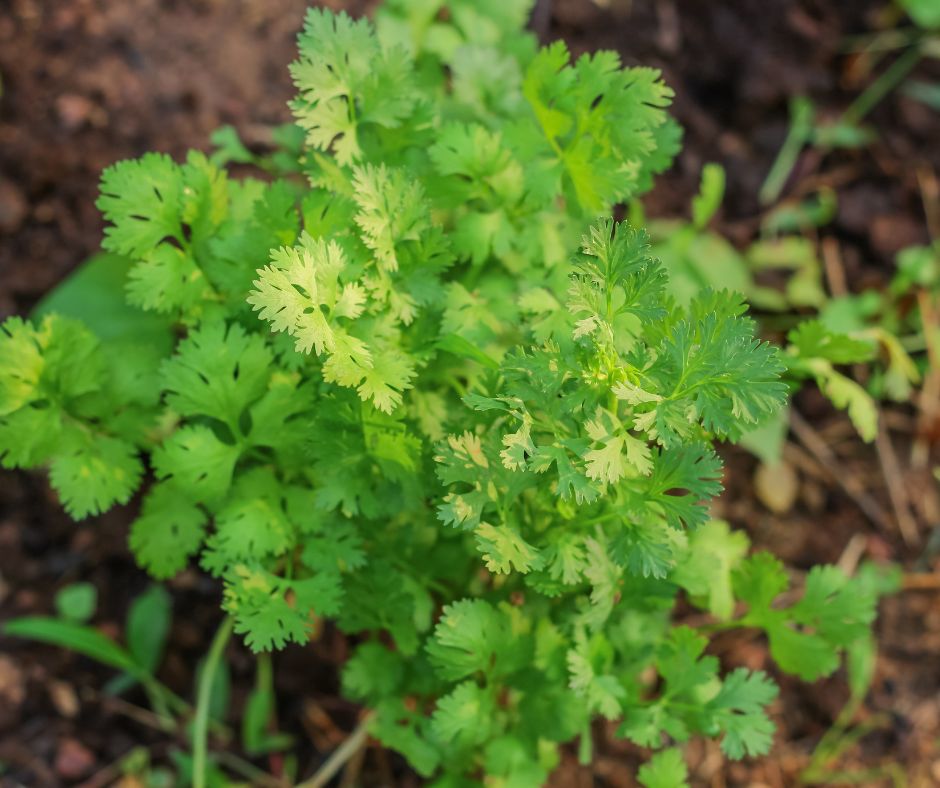
How To Save Cilantro Seeds
Saving cilantro seeds, or coriander, is easy. I love that this herb is so easy to grow, and the seeds are wonderfully flavorful. You can save some for cooking and save another batch for planting.
Here’s how to save seeds from this garden-favorite herb:
You’ll need to let your plants flower if you want to save their seeds. Once the flowers die, they produce clusters of brown-colored seeds.
Wait until the flowers have completely dried out and turned brown. You can just leave your plant in the garden – no fussing required!
Coriander seeds are quite big and easy to see, so you’ll know when they’re ready for harvesting.
Grab a clean container and gently rub a seed head between your fingers to release the seeds.
It really is that easy to save cilantro seeds! If you want, you can just let the plant die back naturally and drop its own seeds to have continual cilantro plants growing each year.
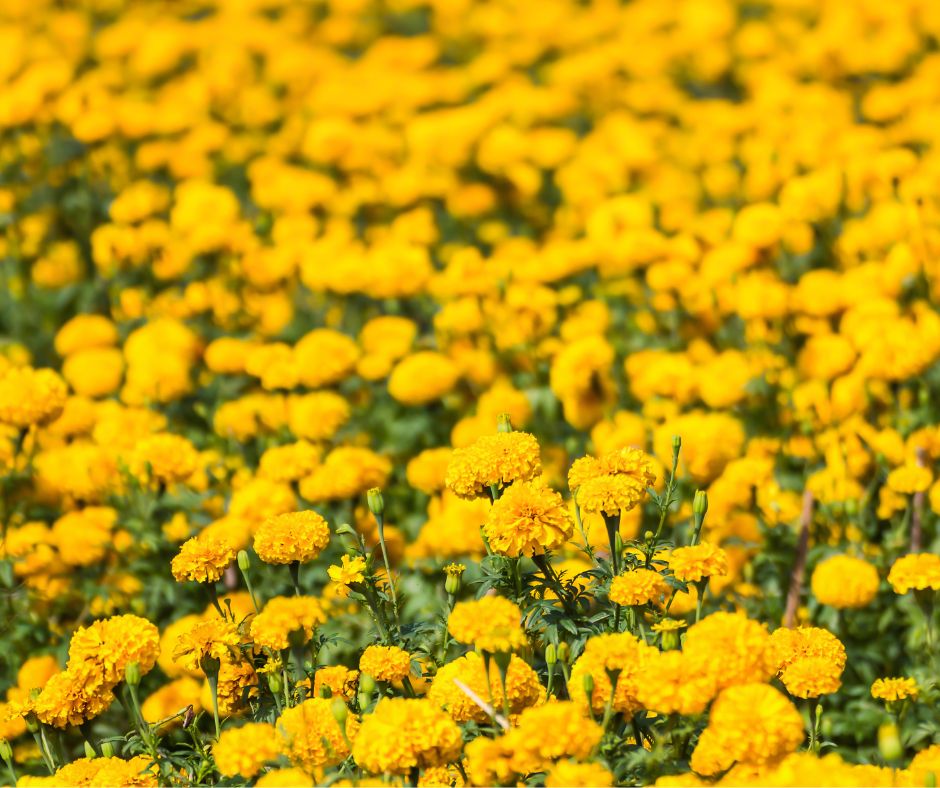
How To Save Seeds from Marigolds
Marigolds are a great addition to any flower or vegetable garden. They’re easy to grow, low maintenance, add bright color and keep pests away. Because they are annuals, they need to be replanted every year. The good news is that you can save seeds from your plants each year to have a free, endless supply of marigolds.
Saving marigold seeds is easy, but finding them can be tricky. Why? Because these plants don’t produce recognizable seed pods.
The key is to wait until the flowers have died back and dried out.
Look for flowers that have withered and dried but still have a little green at the base.
Remove the flower head from the plant by cutting a few inches down the stem.
Gently pinch off the petals while holding the base of the flowerhead with your other hand.
As the petals slide off, you should see some pointy black spears. Here are your seeds. They look kind of like mini broomsticks.
Once you’ve gathered your seeds, you can save them for planting next year.
Storing Seeds
Gathering seeds is a rewarding practice and one that will continue to fill your garden with healthy vegetables or herbs for your family. Once you’ve harvested your seeds, make sure that you store them in an airtight container in a cool, dry place. Optimal seed storage is the key to ensuring your seeds have good germination rates.
Late summer is approaching, which means we’re knee-deep in the summer harvest period. While you’re busy harvesting, tending and feeding your summer crops, it’s time to start thinking about fall. Mid-to-late summer is the ideal time to plant cool-season crops in your fall vegetable garden.
If you’re not sure where to begin, we’re going to cover what vegetables to plant in fall and when to plant cool-season crops.
What to Plant in Your Fall Vegetable Garden
Fall brings cool temperatures and fewer hours of sunlight, so you’ll want to plant hardy vegetables in your garden bed or containers. There are plenty of fresh vegetables you can grow in fall and keep your garden beds producing before the first frost.
Here are some great cool season crops to plant:
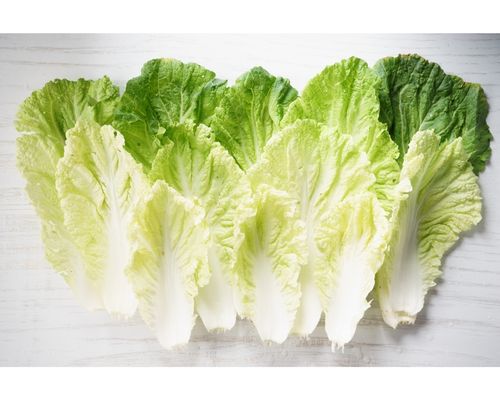
Chinese Cabbage
Fall is the perfect time to grow just about any plant in the cabbage family, but Chinese cabbage is especially easy to grow. There are two main varieties:
Napa cabbage
Bok choy
Chinese cabbage grows very easily from seed, but you can also purchase transplants or start your seeds indoors if you want a quicker harvest.
Seeds should be started indoors 6 weeks before being planted outdoors. If you plan to sow your seeds directly into the soil:
Plant them 6-8 inches apart
Thin to 12-18 inches apart once they sprout
Plants that are close together will be more flavorful, but they’ll also be smaller and more prone to disease.
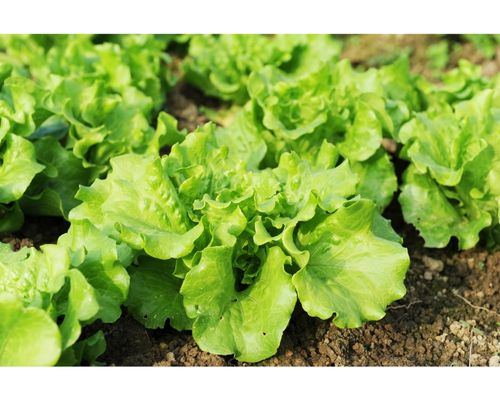
Leafy Greens
Hardy greens are perfect for fall gardens, and with the right setup, you can enjoy harvests through early winter.
Some of our favorite leafy greens to plant in fall are:
Spinach
Kale plants
Mustard greens
Asian greens
Collards
Bibb and leaf lettuce
Swiss chard
Leafy greens like the ones above thrive in a soil temperature of around 60 degrees Fahrenheit, which makes them ideal for fall planting. Kale is especially hardy and can withstand soil temperatures below 50 degrees Fahrenheit and light frosts in many cases.
If you’re sowing seeds directly into the soil, try to plant seeds every two weeks to ensure a continuous harvest.
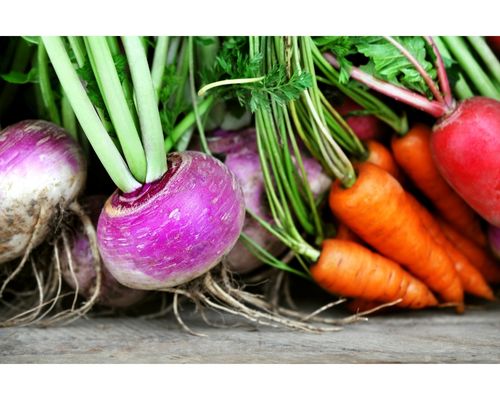
Root Crops
Root vegetables are perfect fall crops to plant. Some great options are:
Beets
Carrots
Leeks
Turnips
Rutabagas
Kohlrabi
Potatoes
Parsnips
Radishes
The great thing about root vegetables is that they can be stored for several months.
Beets can keep for 1-3 months. Store them in an open container with a damp towel over the top. Don’t put them in the refrigerator.
Carrots can keep for 4-6 months. Store them in an open container in a cool place (like the crisper drawer of your refrigerator) and wrapped in a damp towel.
Kohlrabi can keep for 2-3 months without its leaves. Store them in a perforated plastic bag in the crisper drawer of your refrigerator.
Parsnips can keep for 2-6 months without their greens. Store them in the crisper drawer of your fridge wrapped in a damp towel.
Radishes can keep for one month in the fridge covered in a damp towel. If you have a root cellar, they can keep for up to three months if stored properly.
Rutabagas can keep for 2-4 months if placed in wooden crates or buckets. Make sure the roots aren’t touching each other.
Potatoes can keep for 5-8 months if stored in a cool, dark place.
Turnips can keep for 4-5 months if stored in a container covered with a damp cloth.
Bush or Pole Beans
If you want a crop of beans in the fall, plant pole or bush beans. Although bush beans are preferred as a fall crop, you can still incorporate pole varieties in your fall vegetable garden plan.
If you’re planting a bush variety, look for one that matures within 45 days.
Garden Peas
Another great crop to grow for fall is garden peas. They’re easy to grow, and they can withstand chilly temperatures. But there’s one important thing to note here: you need to start your seeds pretty early.
It’s best to start your garden peas in late June or early July. Even though the harvest time is around 60 days for many varieties, it’s important to remember that the days are getting shorter after the summer solstice. It can easily take 70 days for your peas to be ready, so start a little earlier to ensure a healthy fall crop.
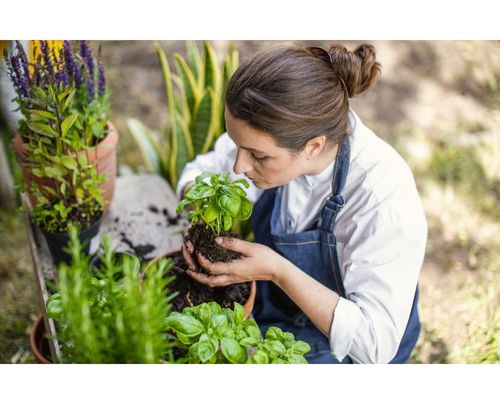
Herbs
Fall is a great time to plant hardy herbs. If you live in an area with mild winters, you can easily grow herbs until pretty late in the season.
Some of the best herbs to plant in mid-to-late summer are:
Sage
Parsley
Lavender
Cilantro
Mint
Chives
Thyme
Rosemary
These are herbs that are fairly easy to grow and will reward you with flavorful aromatics to add to your favorite fall dishes.
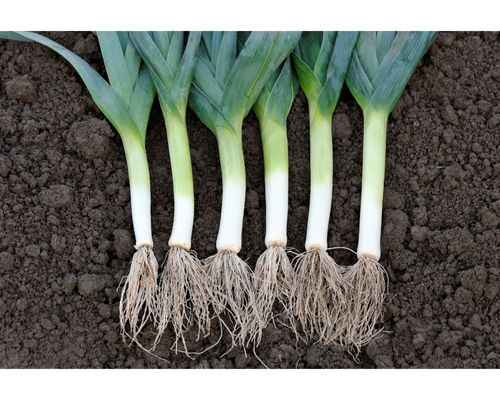
Leeks
Leeks are another excellent crop to plant for fall, but like with peas, you’ll need to get started early with your seeds.
If you can get into the practice of successional sowings, you can enjoy leeks throughout much of the year.
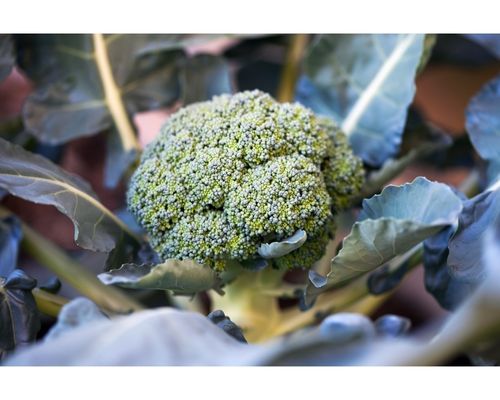
Broccoli
Among the many cool-season vegetables, broccoli is a favorite. For a fall crop, you can sow your seeds directly into your garden beds anywhere from July through mid-August, depending on which zone you’re in.
Broccoli is easy to grow, but it loves moisture and needs some space to spread out.
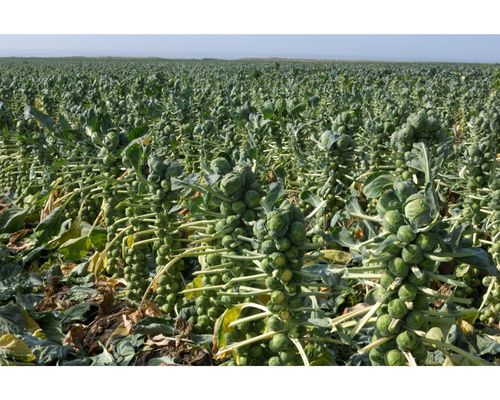
Brussels Sprouts
Early fall is the perfect time to plant Brussels sprouts, as they prefer cooler temperatures. Just make sure that you give them plenty of space to spread out.
Keep them 18-24 inches apart, and plant them in an area that gets at least 6 hours of sunlight per day.
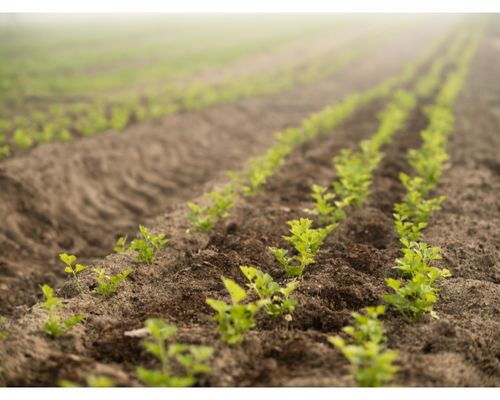
Celery
Celery requires a long growing season, so it’s best to start your seeds indoors. For a fall harvest, start your seeds 10-12 weeks before the first expected frost date.
Celery requires moist soil and can take up to 140 days to come to harvest.
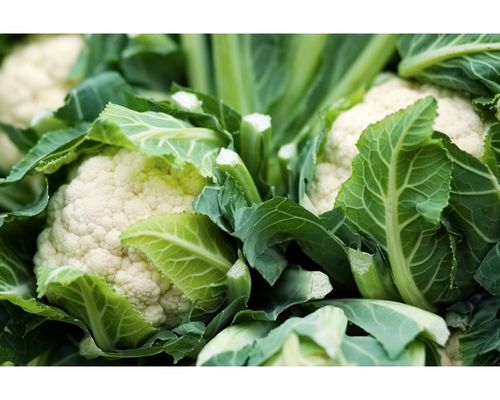
Cauliflower
For a fall crop, plant cauliflower 6-8 weeks before the first frost. Be sure to shade them, as cauliflower isn’t a fan of the heat. They prefer moist soil, so don’t let the ground dry out when planting.
When to Plant Your Fall Vegetable Garden
Now that you know what to plant, you may be wondering when you should start your fall garden. The answer really depends on your zone.
The shorter your growing season, the earlier you need to start or sow your seeds.
To find the best time to plant, we recommend checking the Almanac’s recommendations. You can use this helpful planting calendar to figure out the best time to plant fall vegetable garden plants in your location.
Most vegetables that grow in the fall can be directly sowed in late summer, but the harsher your winters, the smaller the window for planting.